WordPress is one of the most versatile platforms to build a website because you have complete control over its installation and configuration. One of the files that give you some of this control in WordPress is the .htaccess file.
It is a configuration file that allows you to see how your server is running. And, depending on your hosting environment, can be used to change a variety of features in your WordPress install.
Knowing what you can and can’t do with the file is very helpful, and today I will cover everything you need to know about the .htaccess file in WordPress.
What is the .htaccess File in WordPress?
The .htaccess file is a configuration file in WordPress that is used to enable or disable features on your install, perform configuration changes per-directory basis, and is the default file WordPress uses for redirections and permalink structures.
The file is usually located within your website’s root directory. However, sometimes it is possible for WordPress to not generate a .htaccess file at all. In those cases, the user must manually create one.
It is also worth noting that many plugins will use the .htaccess file for proper operation. Caching and security plugins are the most common, but any plugin can use .htaccess.
Some of the main uses of the .htaccess file include:
Redirect Users to a Custom Error Page
There are many common WordPress errors that you will encounter while running a website. These errors are very inconvenient and can hurt your SEO. You can mitigate the effects by redirecting visitors to a custom error page.
Of course, this can be used for general redirections as well. Many redirection plugins will directly write in the .htaccess file.
Decide What File to Use as the Index File
By default, when visitors access your website, they will encounter something along the lines of www.ggsexample1.com/index.html or www.ggsexample1.com/index.php. You can actually change what file will act as the index within the .htaccess file.
Not only can you change this file, but you can actually remove it entirely, which is what most major websites do.
Password Protect Files
Security is a big concern for every website, and one way to improve it is to password protect your files. This ensures that only people who are supposed to access a file can do so. You can do this through the cPanel, but it is far quicker to do so through .htaccess.
This ensures that only users with the necessary info will be able to make changes to those files.
Caching
Caching can help speed up your website by removing temporary files that slow the experience. You can actually clear your cache from within the .htaccess file, but you really should consider using a caching plugin to get the best results.
You can also set up expiration timers for cached content. This will help make sure it deletes itself after a certain amount of time.
When you hear of someone mentioning “leveraging a browser cache,” one of the methods is through .htaccess.
Restrict Access to Your Website
It’s also possible to block specific IP addresses from accessing your website. In fact, you can even go a step further and block specific countries. This is a great tactic to help reduce spambots.
It can also be helpful if you don’t want to deal with GDPR compliance, but it’s not a full-proof solution.
Where Do You Find the .htaccess File for WordPress?
If your WordPress installation has generated an .htaccess file, its location will be in your website’s root directory. This is typically named the public_html directory.
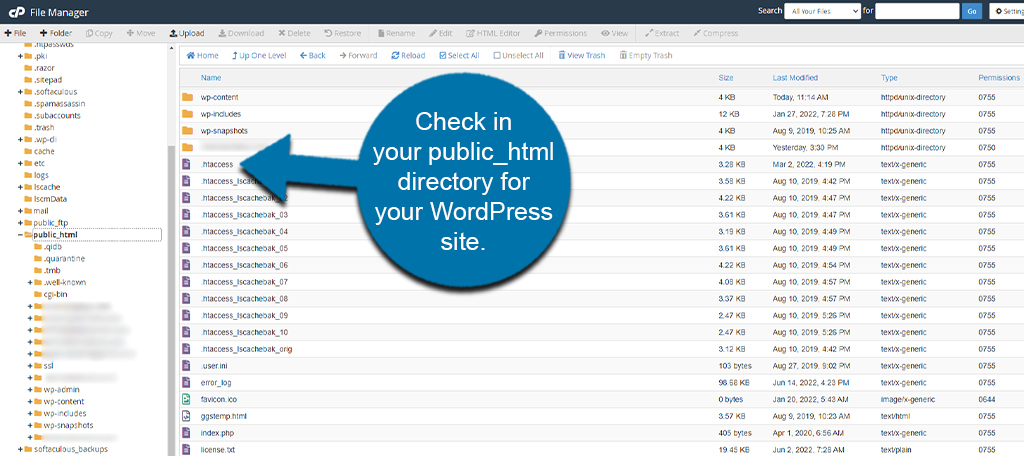
So you may be wondering, why isn’t there always a file if it is so important?
One of the more common reasons is that the file does exist, instead, it is hidden by the file manager you are using. Thus, it is always important to make sure your FTP is configured to show hidden files.
If WordPress has recently failed to update, it is possible for the .htaccess file to be deleted. Alternatively, plugins that can write in the file can sometimes delete it as well.
The good news is that the existence of this file will not impact your website’s performance. The only thing it limits is your ability to change certain configuration settings.
How to Safely Create and Edit .htaccess from WordPress
Now that we know what the .htaccess file is and where it is located, it’s time to start talking about editing it. However, since it is possible for the file to not currently exist, we need to know how to generate it.
Luckily, this is pretty easy to do.
How to Generate the .htaccess File in WordPress
There are several ways to generate a .htaccess file in WordPress, and none of them are very complicated.
By far the easiest method to generate the .htaccess file is to simply update your permalink structure settings in WordPress. And just to be crystal clear, this doesn’t require you to actually change them at all.
To do this, click on Settings and select the Permalinks option in WordPress.
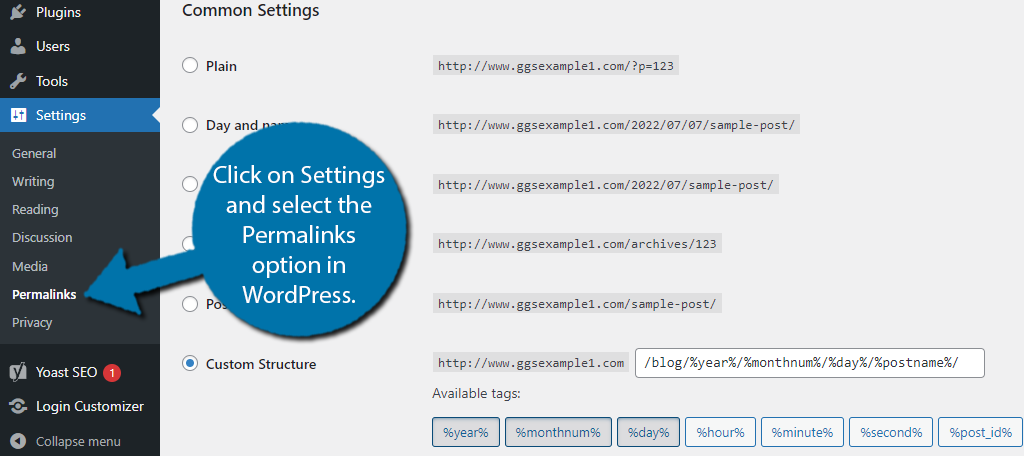
Here, you will find all of the options to customize the permalink structure for your website. You don’t have to change anything on this page.
In fact, make sure to not change anything here, as it can seriously mess up your website’s SEO ranking and break every internal and external link to your content.
Simply scroll down to the bottom and click on the “Save Changes” button.
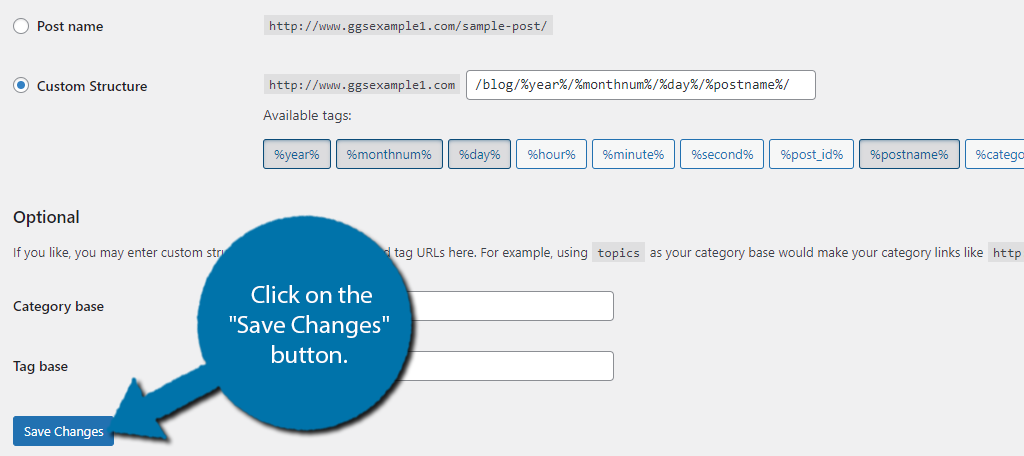
And that’s it. You should now have a .htaccess file generated. If not, then that is a good indicator that the file already exists and is hidden.
How to Edit the .htaccess File
Now that you have the .htaccess file in place, you can begin editing. Like most things in WordPress, there are several ways to go about it with the two main ways being to use a plugin or to directly edit the file.
Using a plugin allows you to edit the file without having to go into the cPanel. Thus, many developers prefer it as you can do everything from the website itself.
Yet, many also like to avoid installing unnecessary plugins.
Using the Htaccess File Editor Plugin
The Htaccess File Editor plugin is truly the best plugin to use to safely edit the WordPress .htaccess file.
Unlike directly editing the file in the file directory via cPanel or an FTP, this plugin will automatically scan your .htaccess file and look for syntax errors that would cause a fatal error.
On top of this, the plugin automatically generates a backup of your website each time you edit the file. This ensures that if it does not catch an error, you can still easily restore your website within minutes.
Luckily, getting started with the plugin is really simple, so let’s get started.
Note: If you are new to coding it is important to understand the difference between a syntax and logic error. A syntax error is when you type something out incorrectly or forget a semicolon. A logic error is when what you type is correct, but it does something different than intended. This plugin will only catch syntax errors.
Step 1: Installing Htaccess File Editor
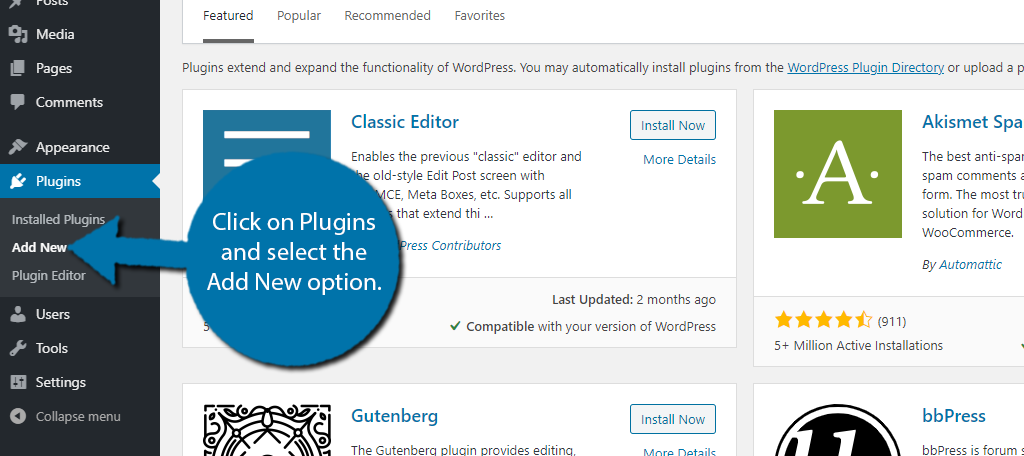
Let’s start by clicking on Plugins and selecting the Add New option on the left-hand admin panel.
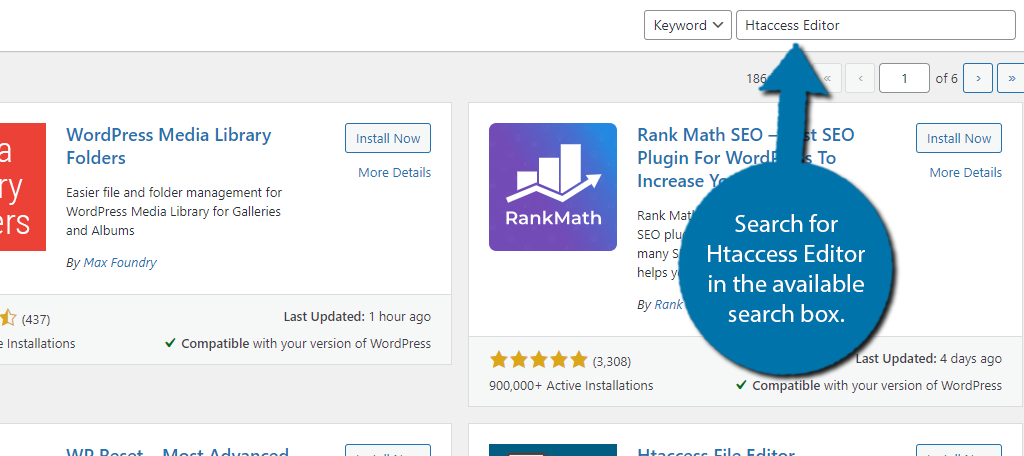
Search for Htaccess Editor in the available search box. This will pull up additional plugins that you may find helpful.
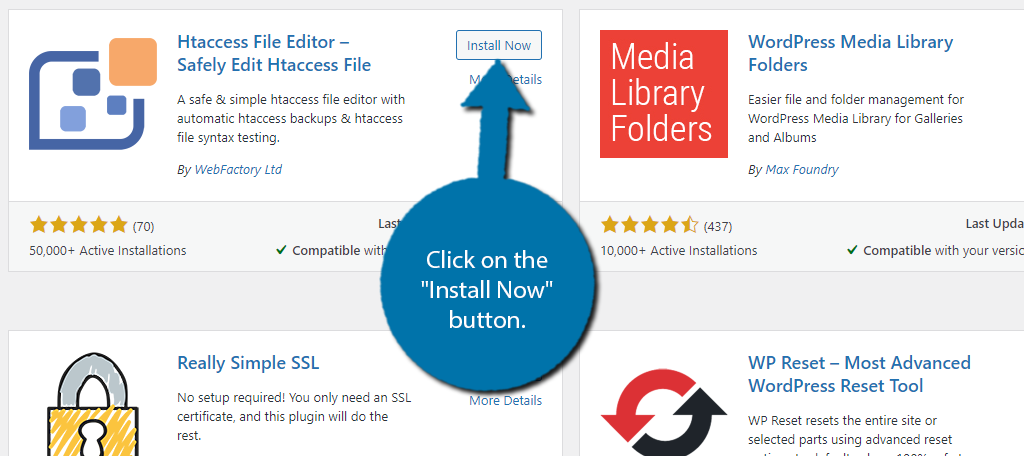
Scroll down until you find the Htaccess Editor plugin by WebFactory LTD. Click on the “Install Now” button and activate it for use.
Before going forward, it is very important to talk about the dangers of messing up the .htaccess file. Doing so can completely take your website offline and you will not be able to access your content.
You will know it is a .htaccess error if you see error 500 or a white screen.
If this happens, you will need to use an FTP client to upload a backup of your .htaccess file or delete it entirely. This can be a very frustrating experience if you are new to WordPress.
Thus, I only recommend editing the .htaccess file if you have the proper knowledge.
Step 2: Using the Htaccess File Editor Plugin
On the left-hand admin panel, click on Settings and select the WP Htaccess Editor option.
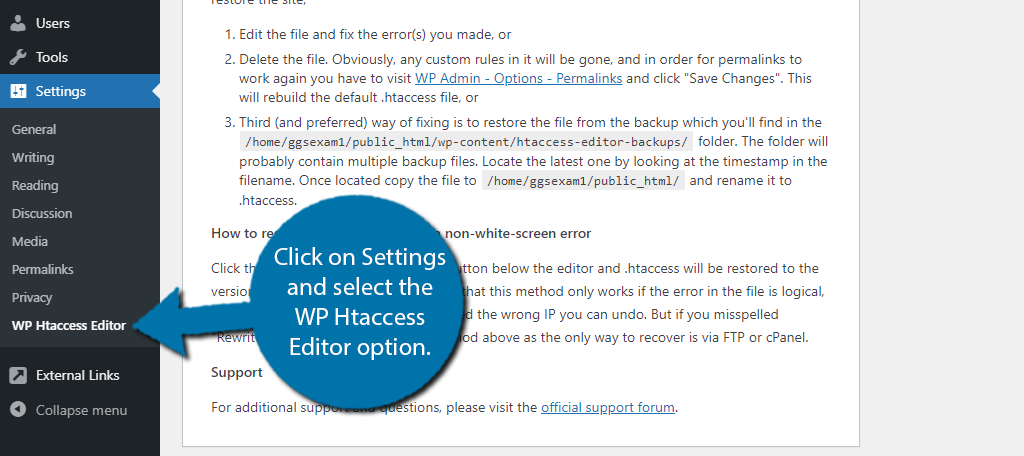
The first thing you should see is the “please read carefully before proceeding” section.
This outlines what to do if you do not correctly edit the file. I highly recommend copying everything in this section and pasting it into a Notepad or Word document. If you make a mistake, you will not be able to access your website to read it.
Underneath this section, you should see a red box warning you about editing the .htaccess file. It also informs you that a backup is created when you make a change.
Click on the “I understand. Enable the editor.” button.
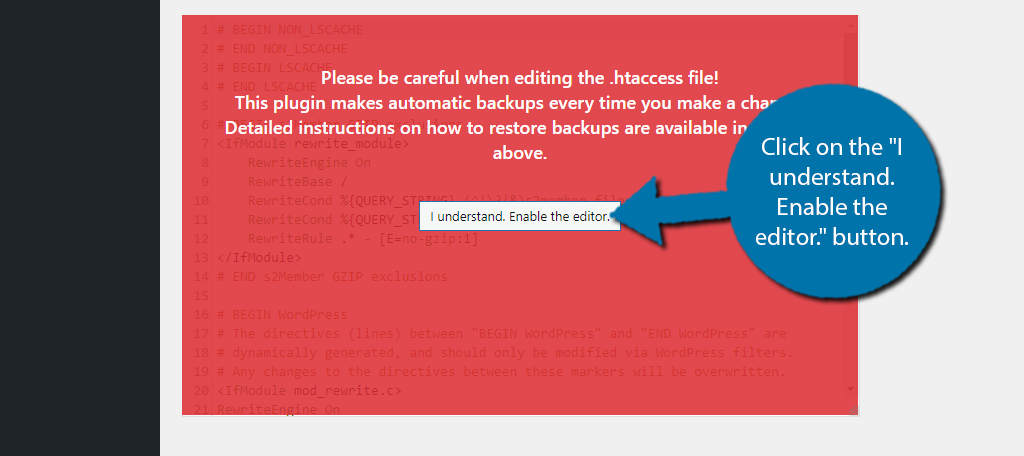
You will now have full access to edit your Htaccess file.
Step 3: Check for Errors and Save the Changes
At the bottom, you will notice three buttons. These include the Save Changes, Test Before Saving, and Restore Last Backup buttons.
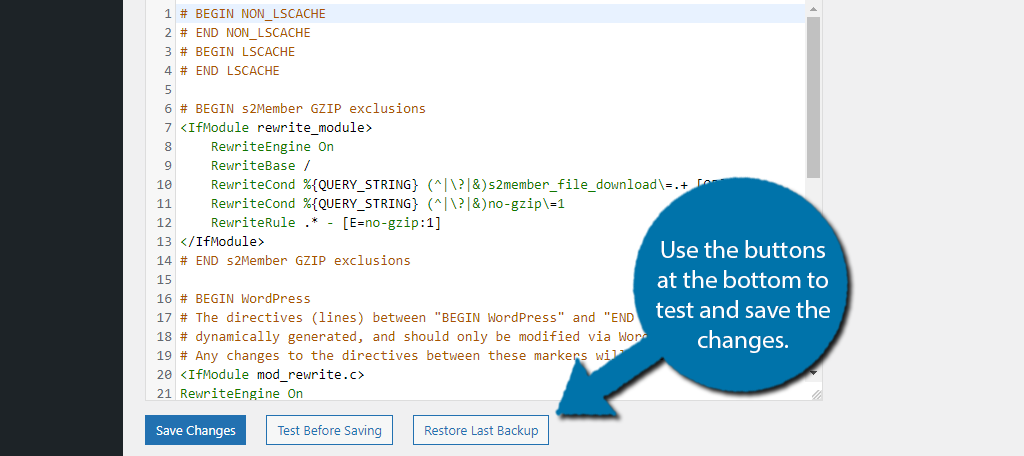
Always click on the Test Before Saving button first. This will check for syntax errors.
If something is not working correctly after making a change and you are not experiencing an Error 500, you can use the Restore Last Backup button to correct the problem.
Congratulations on learning how to safely edit your .htaccess file in WordPress with the Htaccess File Editor plugin.
How to Create and Edit .htaccess from cPanel
The more direct approach to creating and editing the .htaccess file is to do it manually from the cPanel. This is traditionally the most common way to edit files in WordPress.
It has the distinct advantage of not requiring a plugin. Thus, many developers prefer this method.
Manually Upload an .htaccess File in the cPanel
The second method is more direct, as it involves actually uploading the .htaccess file yourself. Now, I know what you are thinking, do I really need to write up the entire file to upload it?
No. Instead, you can just create a blank file named .htaccess and upload it to your website’s root directory.
To do this, open up a program such as Notepad (really any word processor will do) and save the document as .htaccess. You can also take this time to enter any of the code you want to include in the file.
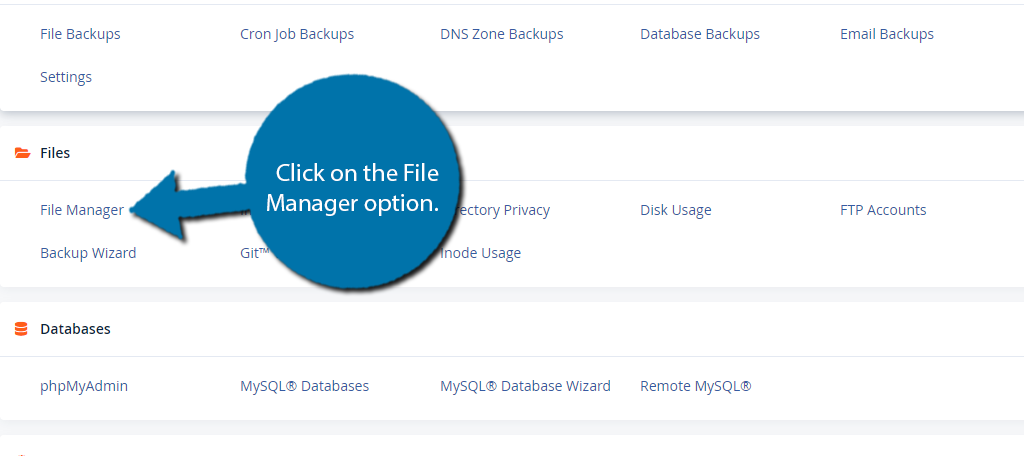
Once the file is ready to go, log into your hosting account and access the cPanel. Click on the File Manager option.
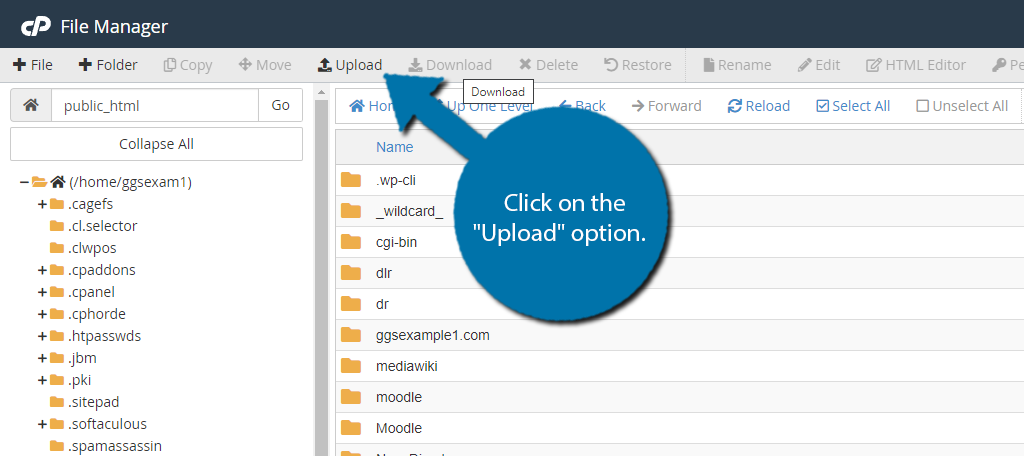
Locate and enter your website’s root directory. This is usually called public_html, but the name may vary. Once inside, click on the “Upload” option to begin uploading your file.
This will open up a new tab on your web browser. You can either drag the file into the box or use the “Select File” button to select the file you wish to upload. The file will then be added to your current directory.
Manually Editing the .htaccess File in WordPress
Like every file in WordPress, you can manually edit the file using your cPanel. The main difference from the plugin method is that plugins tend to offer extra safeguards that can protect you from mistakes.
Those are not present when directly editing code in a file, thus, you need to make sure what you enter is correct.
Step 1: Locate the .htaccess File
Log into your cPanel and access the File Manager.

Enter the public_html directory, locate the .htaccess file, and right-click on it to select the Edit option. For Mac users, CMD+Click will open this drop-down window.
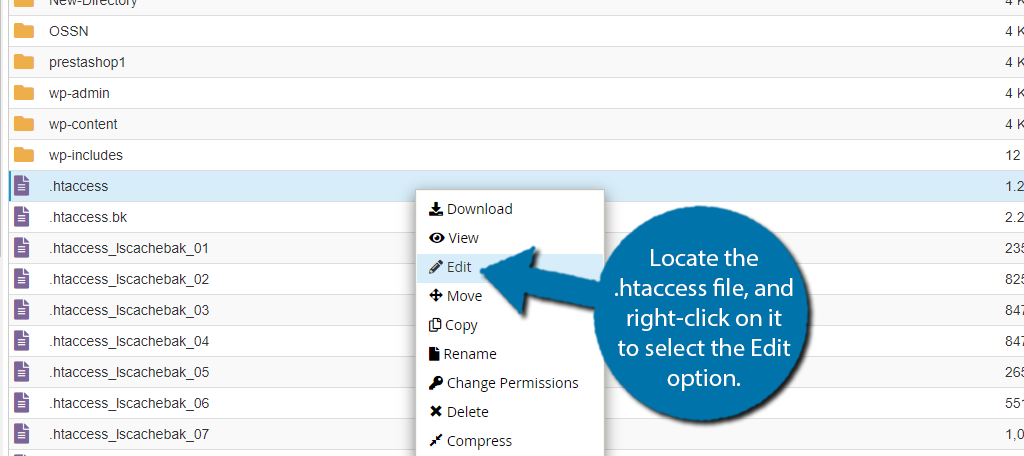
A small pop-up will appear explaining the dangers of editing files directly. It is highly recommended to create an up-to-date backup before making any changes to a file.
This ensures that if something does go wrong, you can use it to restore your website. This helps avoid downtime or simply undo unwanted changes.
Step 2: Edit the File
It is possible for the .htaccess to be blank if you uploaded it recently. If not you should see some default code. Whenever you modify the .htaccess file, or any file in general, it is important to not insert code into a function.
A function is a code section that carries out a specific task or adds a feature. Any code you add should not be within a function, otherwise, it will cause an error.
The good news is that you can find a lot of code online to carry out simple changes in the .htaccess file.
Simply enter the code into the file.
Step 3: Save the Changes
When you are done editing the file, you should immediately double-check everything that you entered. This is the best way to avoid errors.
Keep an eye out for syntax errors and try to play the code out in your head.
When you are completely satisfied, click on the “Save Changes” button in the top right corner.
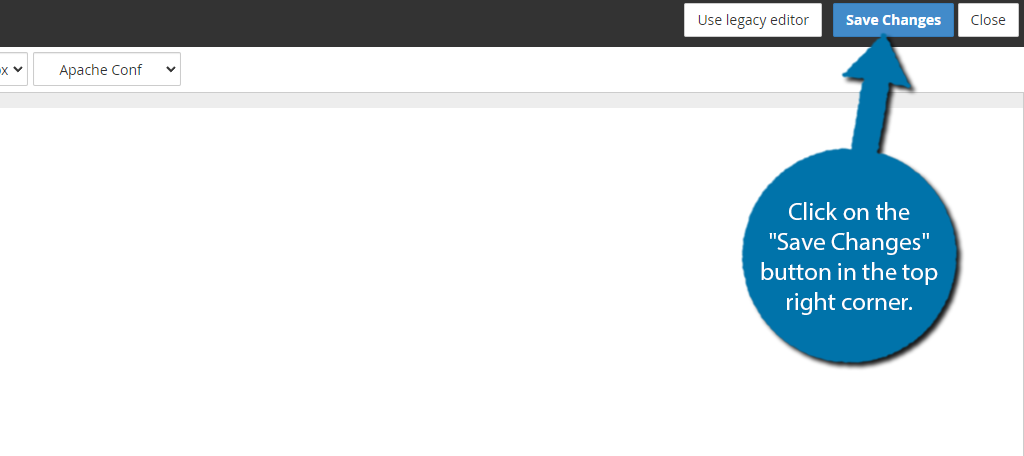
And that’s it. You can check your website to make sure that no errors occurred. If not, congratulations, you have successfully edited the .htaccess file. If there were errors, check the code you added.
WordPress .htaccess File FAQ
Do I Have to Ever Edit the .htaccess File in WordPress?
It’s completely possible to never touch the .htaccess file in WordPress.
Generally speaking, just about everything you can do in the .htaccess file can either be done in another file, or you can use a plugin that will write in the file itself, like a caching or redirection plugin.
In general, users that do not have a lot of coding experience should try to avoid manually coding files whenever possible. Simple mistakes can end up in downtime, which is why I always recommend all website owners learn the basics of coding.
Can I Use the Theme File Editor to Edit the .htaccess File?
No.
As the name suggests, the Theme File Editor only allows the user to edit files within the currently selected WordPress theme. The .htaccess file is located in your website’s root directory and is not in the theme itself.
The only way to edit this file in WordPress is to use a plugin. And luckily, there is no shortage of those.
Are There Any Other Plugins That Can Help?
Absolutely!
There are a variety of plugins that allow you to directly edit the .htaccess file in WordPress. However, while some of them are very clearly labeled for this purpose, plenty of plugins have this as a feature within them like Yoast SEO.
Here are a few more that I can recommend:
WP Htaccess Control

The WP Htaccess Control plugin is not actually in the plugin directory of WordPress, but it is still completely free. It will provide you with an interface to customize the .htaccess file generated by WordPress.
You will also get access to its permalinks (author, category, archives, pagination, and custom taxonomies). There are a lot of customization options available, so give it a look to see if it is right for you.
Htaccess File Editor
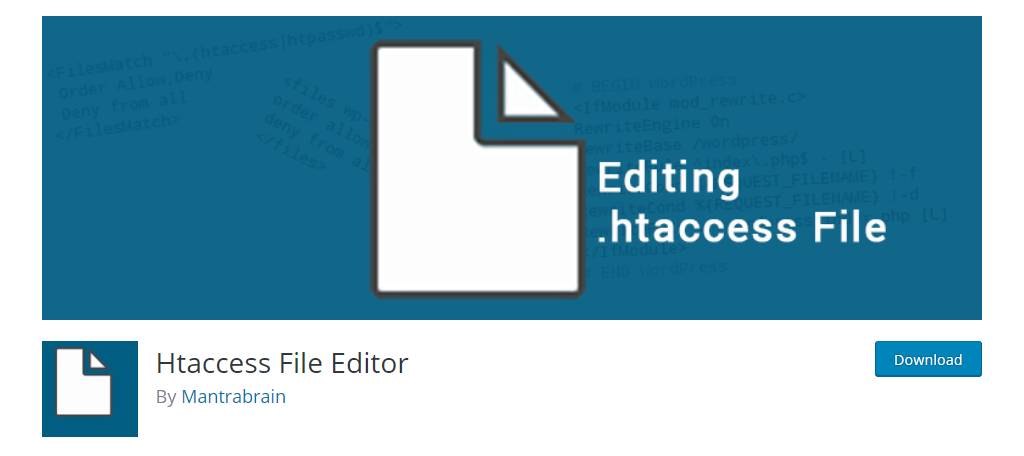
Htaccess File Editor is another great plugin to use if you need to edit the .htaccess file in WordPress. The plugin gives you the ability to edit the file without having to use FTP. Simple as that.
It has some useful features like creating a backup of the .htaccess file. That way, if you make a change that goes wrong, you can restore the file the way it was before the change was made.
Yoast SEO

You probably already have Yoast SEO installed on your website. If not, you should really install it today. It’s one of the top SEO tools for WordPress, and it also lets you edit the .htaccess file.
Yoast offers a superb file editor that can edit the .htaccess file and many others. Sadly, most people that have it installed may not even be aware that this is a feature.
Is the .htpasswd File Related to the .htaccess File?
Kind of.
It is possible to password protect your directories by using the .htaccess file. The .htpasswd file is necessary for this to work, as it is the file where that password is stored.
That said, you don’t actually need to use the .htaccess file. Thus, while there is a connection, they are unique files.
The .htaccess File Can Help You Improve Your Site
While you could certainly create a successful website without ever editing the .htaccess file directly, it would be a pretty rare thing to do. Luckily, it’s pretty easy to make changes to the file, and there are a ton of resources.
Even if you are not a coding expert, you can find code online that can be copied and pasted directly into the file. This lowers the difficulty significantly, but always be careful about using code you found online.
In any event, you should now have a great understanding of how you can safely create and edit the .htaccess file from within WordPress or the cPanel. So be sure to take advantage of it.
Did you find the Htaccess File Editor plugin to be easy to use? Did your website have a .htaccess file generated?


