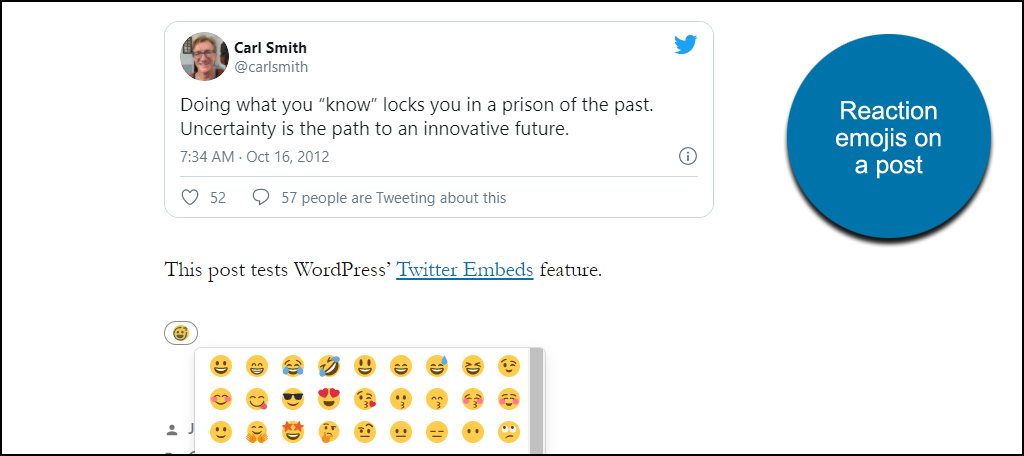
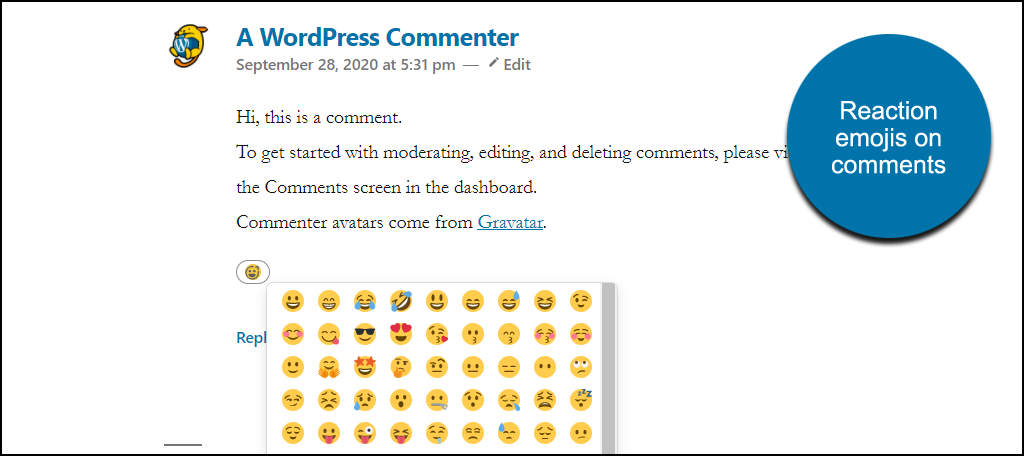
One of the things that make most social media sites so compelling is reader reactions. What if you could add emojis to WordPress to let your visitors react to posts and comments? Now you can. And you can set it up in minutes without editing a file or writing a line of code.
Your visitors are accustomed to being able to react to what they’re seeing or reading with a click. Like, love, laugh, scowl – virtually every reaction people could have to something can be made with an emoji.
Visitors appreciate the ability to react and respond. It keeps them coming back. And seeing those reactions to what we’ve posted, especially the “likes,” makes us feel good.
What Are Emojis?
Emojis are small images used to express emotions in online or mobile communication. They are an extension of early internet emoticons, face-like representations usually made up of a few punctuation marks.
The use of punctuation to represent a face goes back to the 1880s. But we had to wait 100 years to apply it to computer communication.
How to Add Emojis to Your WordPress Website
You can, of course, cut and paste emojis into your WordPress posts and pages (more on that later). That’s a quick and easy way to get emojis into your content.
But how do we give visitors the ability to react to posts or comments with emojis? I’ll show you how to do it using the Remoji Post/Comment Reaction and Enhancement plugin.
Let’s go through the steps to install it on your WordPress site.
1. Install the Remoji Plugin
Log in to your WordPress admin panel.
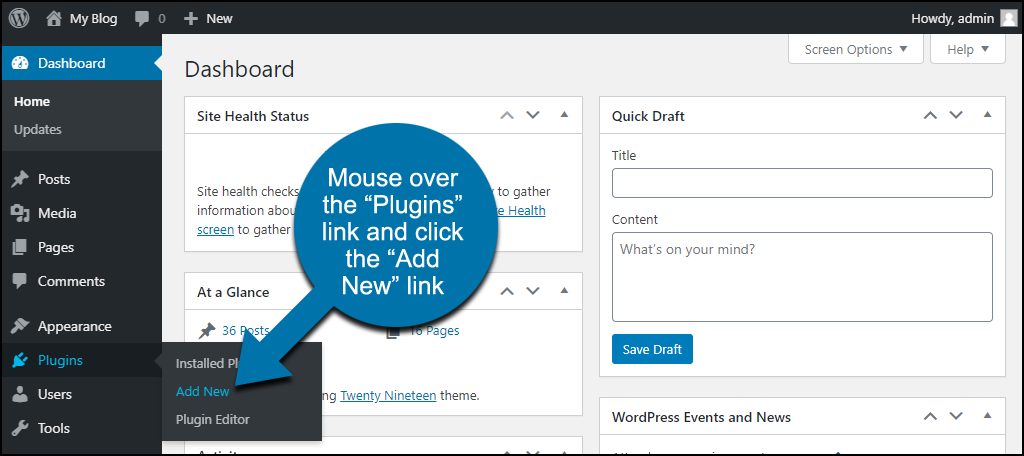
In the left column navigation, mouse over the “Plugins” link and click the “Add New” link.
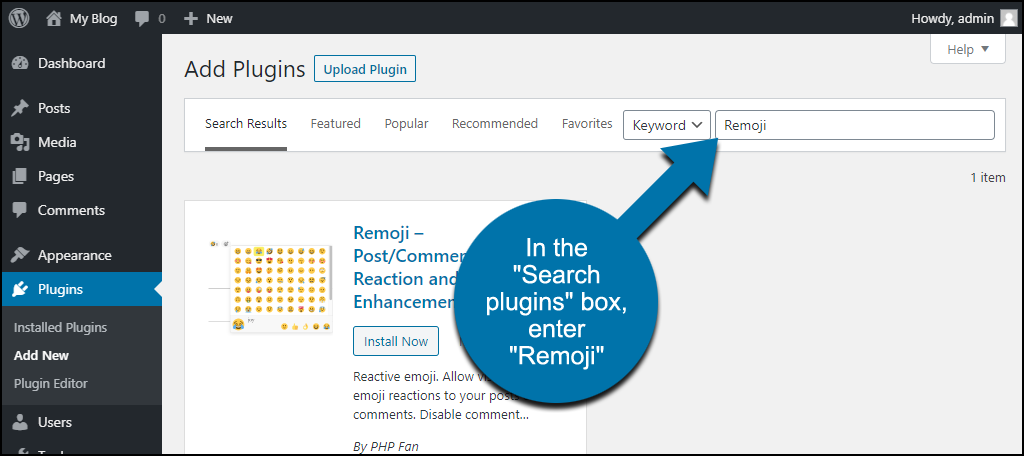
In the “Search plugins…” box, enter “Remoji.”
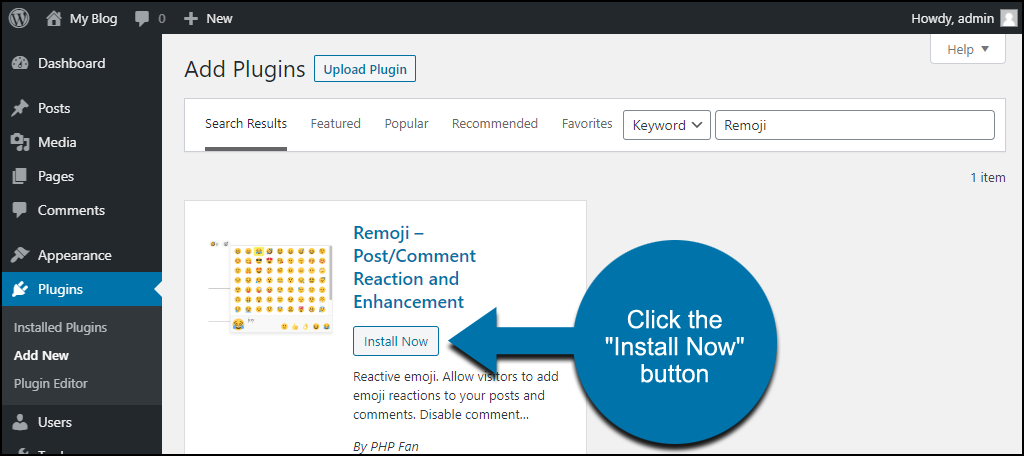
When you find the plugin, click the “Install Now” button.
Now the plugin is installed, but it has to be activated before you can use it.
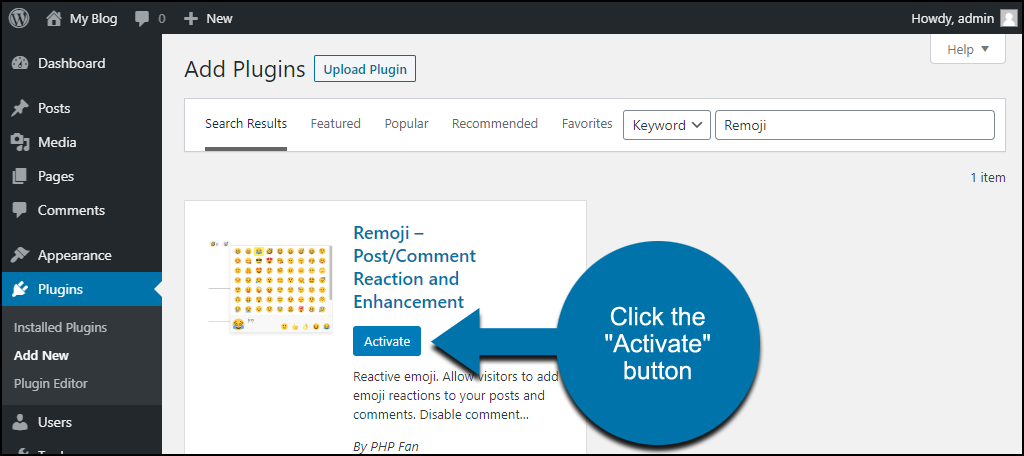
Click the “Activate” button.
That completes installation and activation. Now let’s move on to getting the plugin up and running on your website.
2. Configuring Remoji
As soon as you activate the plugin, visitors will have the ability to react to posts and comments. You don’t need to do anything else to add emojis to WordPress.
But you have a lot of control over how the plugin works. Let’s look at the options.
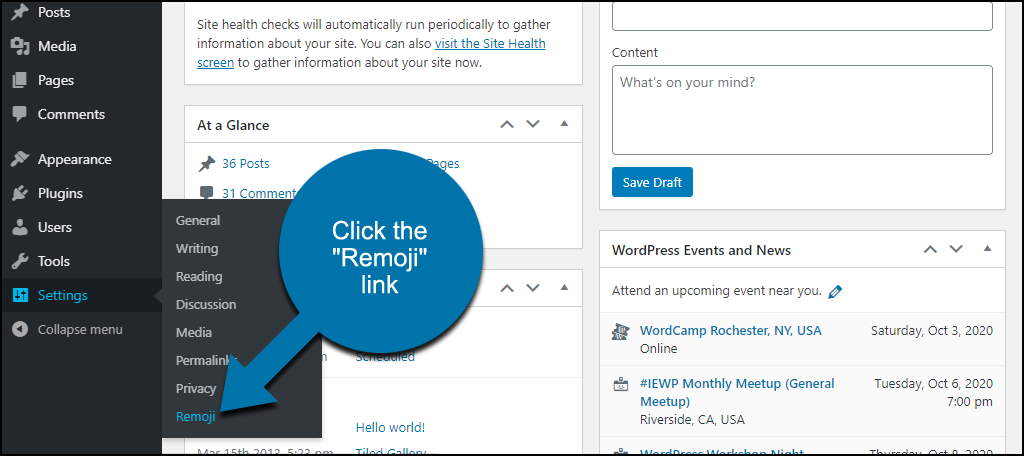
In the left column navigation, mouse over the “Settings” link and click the “Remoji” link.
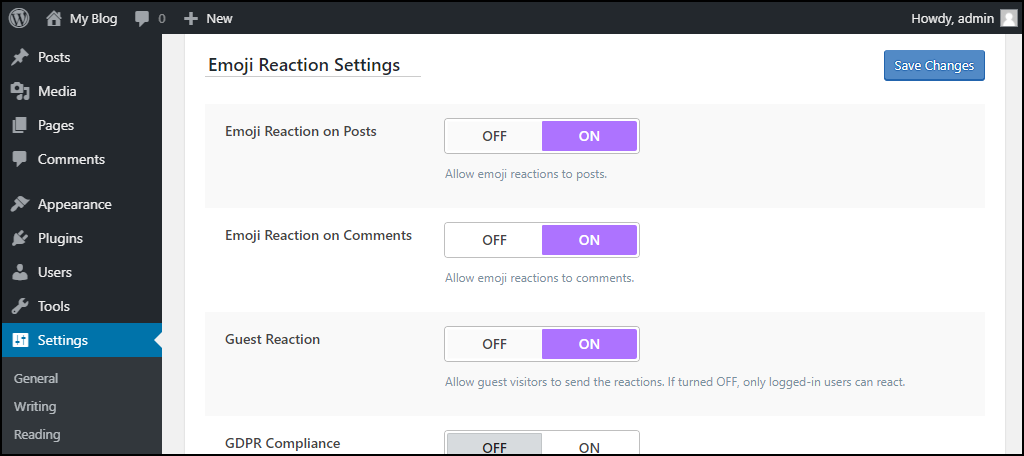
Click the “Save Changes” button if you change any of these settings.
3. Manage Emoji Reaction Settings
- Emoji Reaction on Posts controls whether emoji reactions can be made on posts (site-wide).
- Similarly, the Emoji Reaction on Comments setting controls whether emoji reactions can be made on comments (site-wide).
- Guest Reaction allows guest visitors to use emoji reactions. If you turn this OFF, reactions can only be made by logged-in users.
- GDPR Compliance if you live in the EU or have site visitors from the EU, GDPR applies to you. The Remoji plugin logs IP addresses, and that’s a no-no under the GDPR. When you set this to ON, the IPs are still logged, but they’re “hashed” (unreadable).
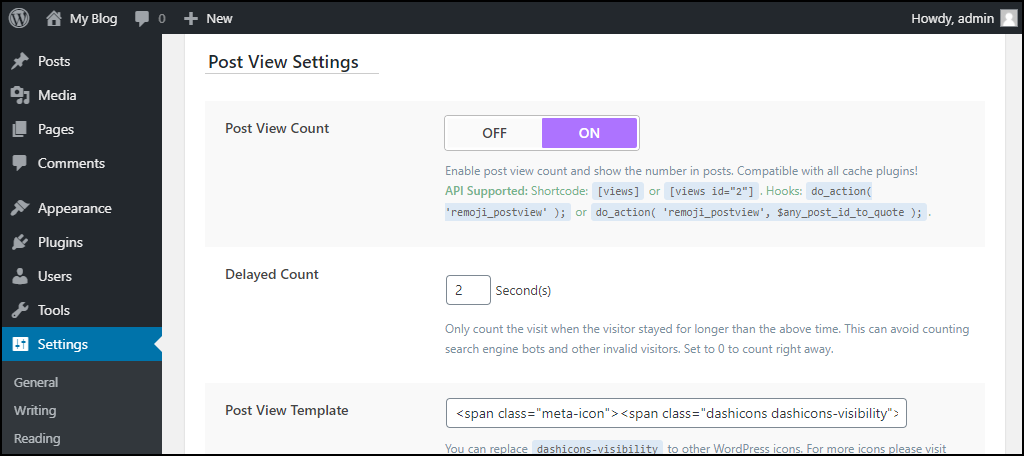
4. Edit Post View Settings
These are advanced settings that control how views are counted, logged, and displayed.
- Post View Count makes it possible to use shortcode in a post or page to display the number of times a page has been viewed. Remember hit counters? 😉 This is that.
- Delayed Count lets you set the amount of time a visitor has to stay on the page to count as a hit. If you don’t want to count search engine bots, leave this set to 2 (or higher). If you want to count every page load, set it to 0.
- Post View Template lets you use a different icon set for the reaction emojis./li>
- Append Post View To Content turning this ON displays the Post View Count/hit counter at the bottom of all of your posts. The shortcode method above only adds the counter where you add the shortcode.
- Append Post View To Theme only works for the WordPress Twentytwenty theme, and you probably aren’t using that.
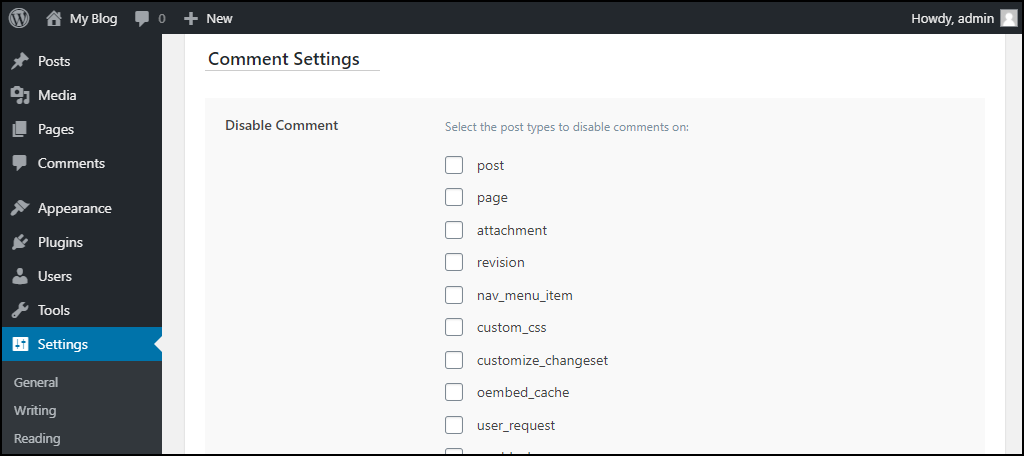
5. Configure Comment Settings
This section allows you to disable comments for a specific category of pages.
To be clear, this doesn’t disable the reaction emojis; it disables commenting for the category. Be careful if you make any changes here. You don’t want to block your visitor’s ability to comment inadvertently.
But if you do want to disable commenting for a category, here are the available options:
- post
- page
- attachment
- revision
- nav_menu_item
- custom_css
- customize_changeset
- oembed_cache
- user_request
- wp_block
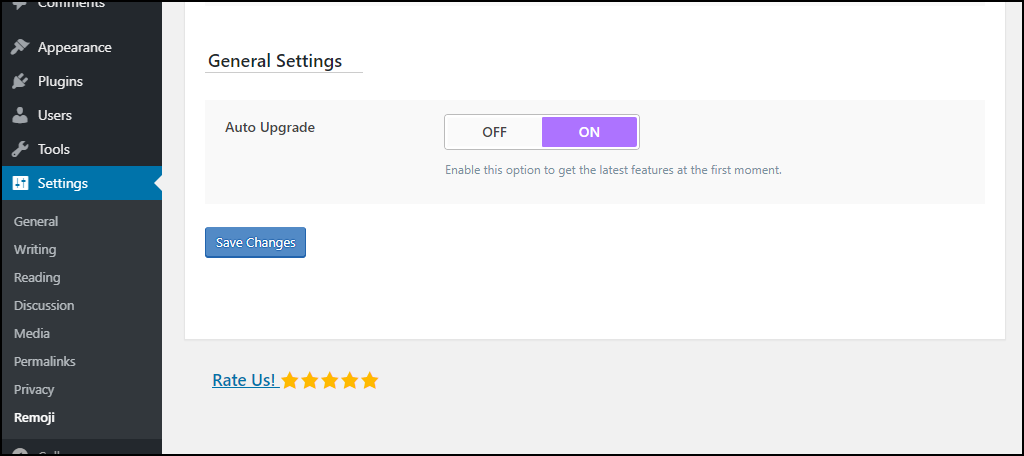
6. Adjust General Settings
The only option here is “Auto Upgrade.” Set it to ON to automatically upgrade the plugin.
As of WordPress version 5.5, the ability to auto-upgrade all plugins is available on the Plugins page.
Remember to click the “Save Changes” button if you change any of these settings.
7. View Emoji Use Data
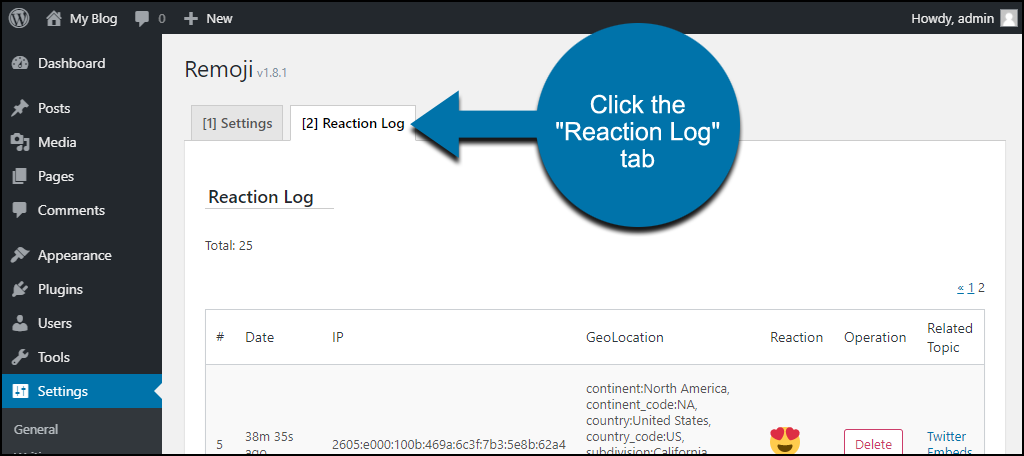
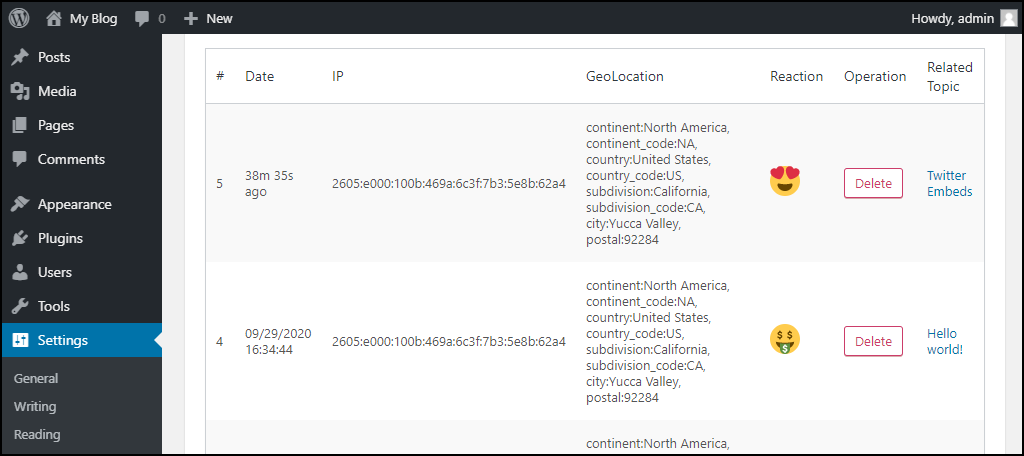
Data is logged any time a visitor uses an emoji. To view the data, in the left column navigation, mouse over the “Settings” link and click the “Remoji” link.
Click the “Reaction Log” tab.
The plugin logs:
- Date and time.
- IP address (unless the GDPR option is selected).
- GeoLocation.
- Which emoji was used.
- The page or post the emoji was used on.
You’ll also see a “Delete” button in the “Operation” field. You can use that to delete single emoji reactions.
What Happens if You Uninstall the Remoji Plugin
If you uninstall the plugin, pages and posts that used the plugin will no longer display the option to add an emoji.
- Visitor data related to emojis will be deleted.
- The plugin shortcodes will stop working, so the shortcodes themselves will be displayed as text anywhere they were used.
How to Add Emojis to the Text in Your Posts and Pages
So far, we’ve been talking about how to add emojis to WordPress so your visitors can use them to react. But what if you want to add an emoji to your posts or pages?
The easiest way to add emojis to a WordPress post or page is to copy and paste them from an online emoji resource library. A good emoji resource is Get Emoji.
Using the library couldn’t be easier. Go to the website, search the emoji library, highlight an emoji, copy and paste it into your page.
Like so:
? ?
That’s really all there is to it.
The process works in the “classic” WordPress editor as well as in the Gutenberg block editor.
You may also want to check out other emoji resource libraries like EmojiPedia. Also, there are older emoji plugins that work similar to the way some popular typographies do – by using a plugin.
Finally, if you’re handy with code, you can implement emojis using custom CSS.
But before you add emojis to your content, you might want to ask yourself an important question:
Are Emojis Right for Your Site?
There’s no doubt that emojis are popular when it comes to texting and social media. But they should probably be used sparingly in written content like your blog posts or WordPress pages.
If you run a casual or irreverent business website or a site geared toward younger customers, emojis can be useful. But you wouldn’t want to see them in a New York Times article.
You may not be the New York Times (yet!), but if your readers don’t expect emojis, don’t use them.
But for what it does, this is a pretty cool plugin. One thing I’d like to see is a limiting function. As it is now, a single visitor can add up to 12 emojis to a page or post. That’s probably not going to be a problem for most of us, but it seems a bit excessive.
Have you ever considered introducing emojis to your WordPress posts or pages? What about using them as an interactive hook to keep visitors engaged?
Let me know in the comments. I’d love to hear from you.

Hi there! Is there any way for users of this plugin to check how emojis render across browsers and devices? For example, will someone viewing your site on an Android see the emoji differently than someone viewing the site on an Apple iPhone vs someone browsing desktop on IE or Chrome?
Works. Instructions failed to say that after activating, you have to go to Settings and _enable_ it.
Nice article
This plugin Emojics is a good way to add emojis on WordPress to collect users feedback 😉 https://wordpress.org/plugins/emojics-wp/