Sending email from WordPress is a feature that some people take for granted. By default, the system uses the PHP function to send things like updates, password resets or notifications from various forms you may use.
However, many people would prefer setting up SMTP through Gmail for WordPress emails. PHP isn’t always the best option. For one thing, it’s easier to be a victim of email fraud.
One viable option is to change the default PHP feature to something that is more stable. For instance, using Gmail offers stability as well as security when sending your messages.
In this tutorial, we’re going to show you how to take advantage of the Gmail SMTP server directly from WordPress.
Why Should You Change from PHP to SMTP?
Simple Mail Transfer Protocol, or SMTP, is the standard system when an email is sent from an actual server. It uses authentication methods to verify user access and offers a layer of security when compared to basic PHP methods.
This makes it more difficult to hack when compared to other aspects of your website.
Another aspect of PHP mail is that it will trigger various spam filters. Depending on the level of security a recipient employs, a spam filter will check the validity of the email received by scanning through the server a message came from.
If it’s unidentifiable by the filter, the message will be tossed aside.
Many people are leery about the messages they receive in today’s world. Making the email look as legitimate as possible can ease the minds of your recipients and may play a part in reducing how often your messages are deleted.
It’s all about making the reader feel comfortable.
Let’s take a look at the plugin in question and see what it has to offer.
The WP Gmail SMTP WordPress Plugin
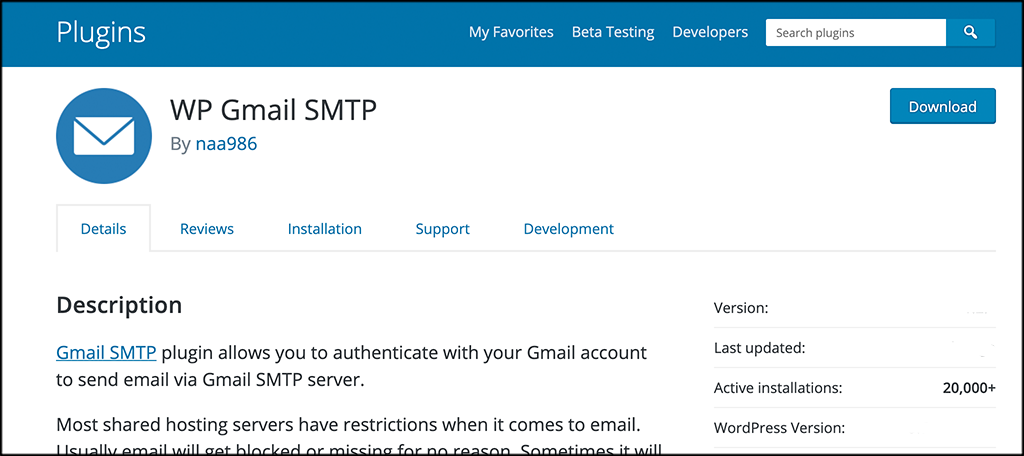
The WP Gmail SMTP plugin will allow you to easily authenticate with your Gmail account to send email via the Gmail SMTP server. See, many shared hosting service has email restrictions in place. This plugin will allow you to work around that and send emails directly from WordPress.
Simply put, the WP Gmail SMTP plugin bypasses all of these issues by routing the email through Gmail’s SMTP server. Now, the plugin itself is easy to install and get going. However, it does take a little bit of setup to get it running properly.
Let’s go over those steps together and before you know it you will be able to securely send an email directly from WordPress.
How to Use OAuth Protocol to Set Up Gmail SMTP from WordPress
While this procedure may seem a bit time-consuming for some, it’s perhaps one of the most secure methods of using a Gmail SMTP server with WordPress. Luckily, the process isn’t that difficult to complete.
As stated above, it takes a little bouncing around to get running, but it is all laid out for you below.
Step 1: Install and Activate the Plugin
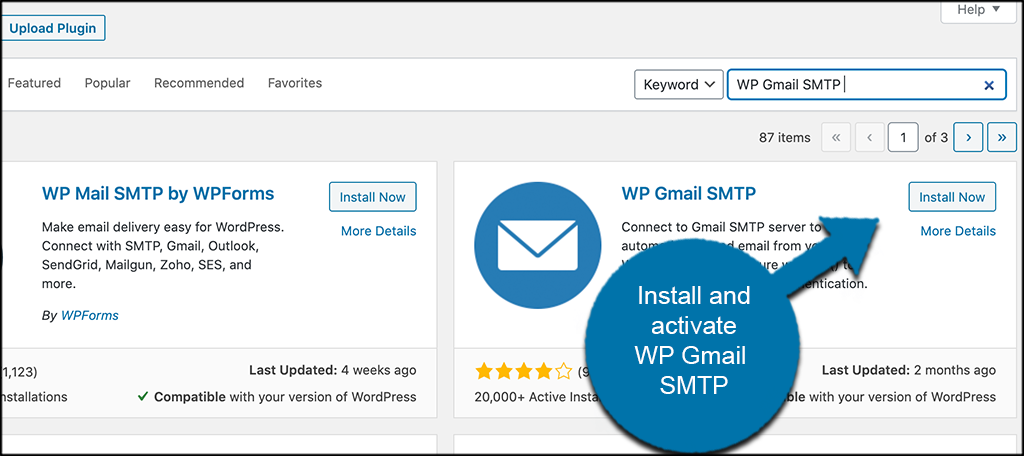
In order to start using this plugin, the first thing you need to do is install and activate it. You can do this right from your WordPress admin dashboard. Simply jump over to the plugins page and use the search field to search the plugin by name.
When you see it pop up, install and activate it from there.
Step 2: Access the Settings Page to Set it Up
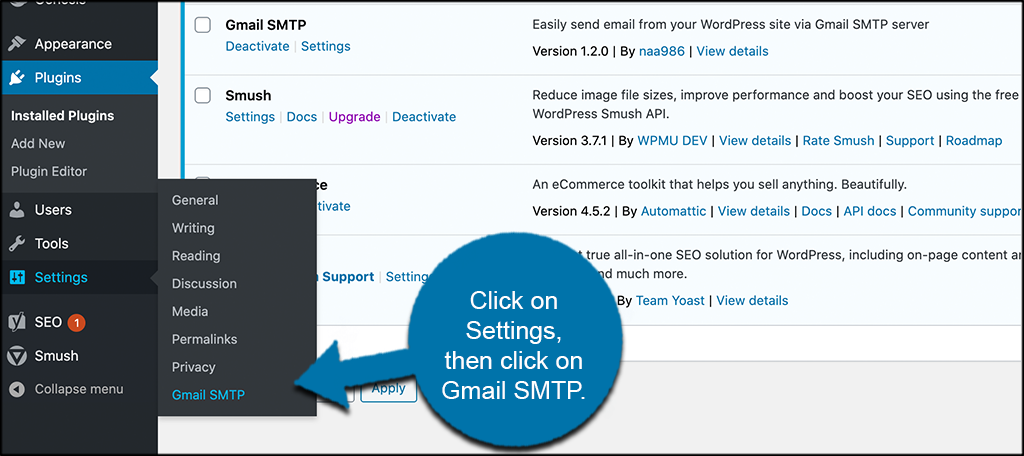
Next, you now need to access the main settings and configuration page for the plugin. You can do this by clicking on Settings > Gmail STMP.
You will see that this is now an available option to click on after you activate the plugin.
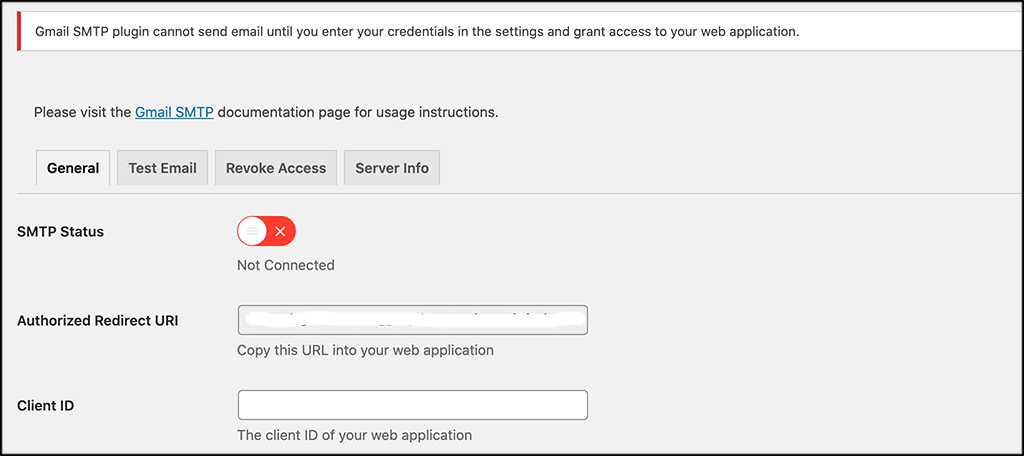
Once on the main settings page, you’ll notice a warning message about how you need credentials to set up your web application. Under this message and within the “Basic Setup Instructions,” you’ll see a link for “Gmail SMTP.”
Click this link to find out more info on the plugin, or go ahead and go to the Google Developers Page.
Step 3: Sign In to Google Account and Create a Project
When you click on the Google Developer link above, you will be taken to an account page where you need to sign in to your account. This is because you’ll have to set up the Gmail SMTP project to link it to WordPress.
After signing into your Google Account, if you haven’t already, a new page will load.
From here, you will see a “Create Project” button link on the top right. Go ahead and click on it.
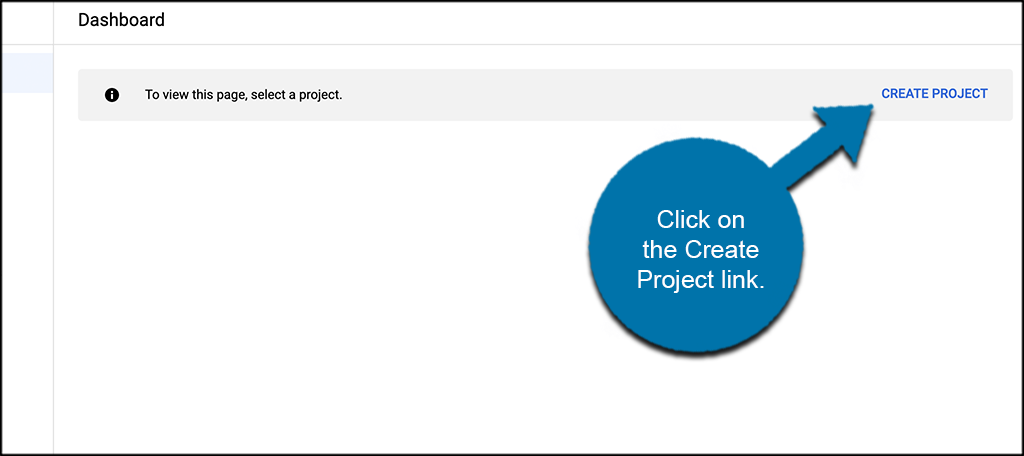
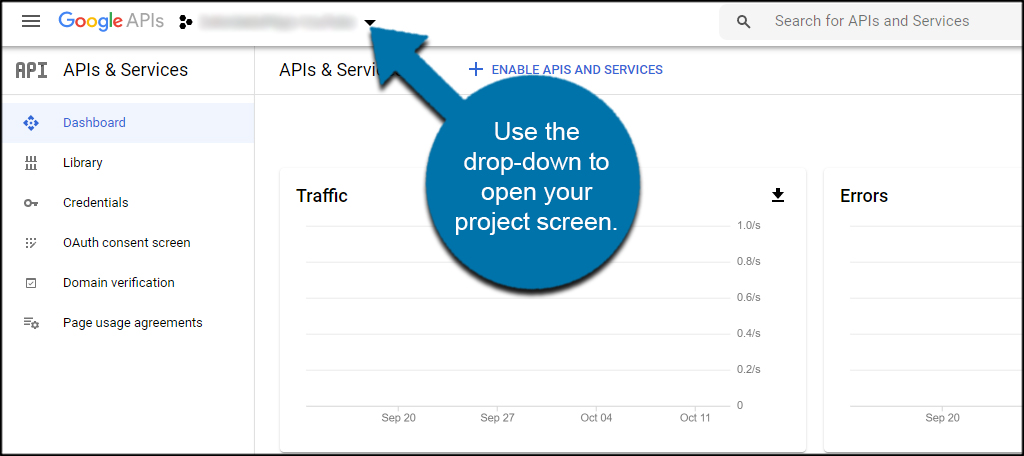
NOTE: If you already have projects saved in Google, you’ll need to click the drop-down next to “Google APIs” to open the new project screen.
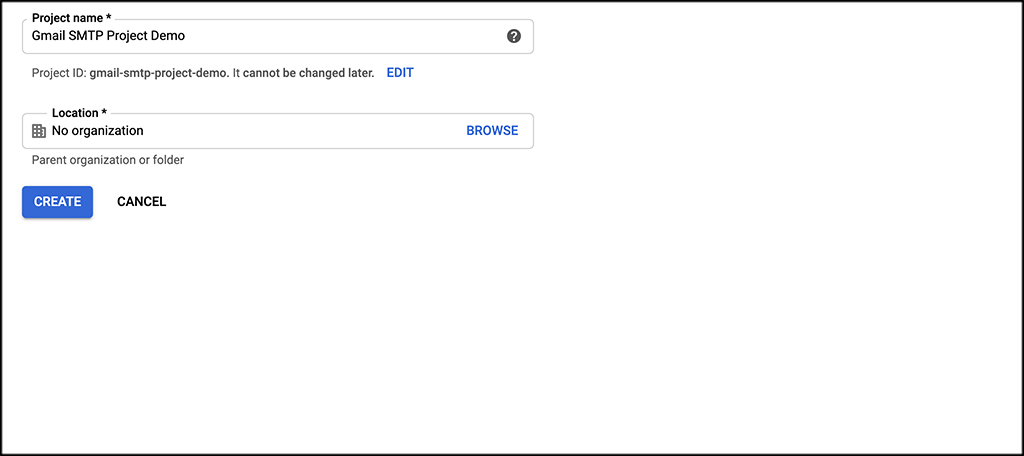
Register your new project by giving it a name and location if you want to. Click on the “Create” button to create the project.
Step 4: Get Gmail API for the WordPress SMTP Function
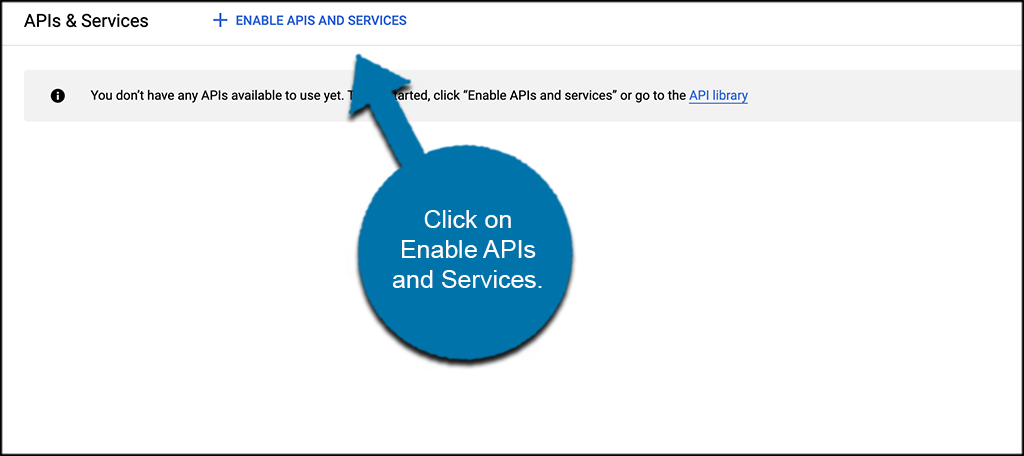
Once the project has been created, you’ll be taken to a new window for the Google Library. You have two options here. You can click on “Enabled APIs and Services” or click on the API library link. For this demo, we are going to click on Enabled APIs and Services on the top of the page.
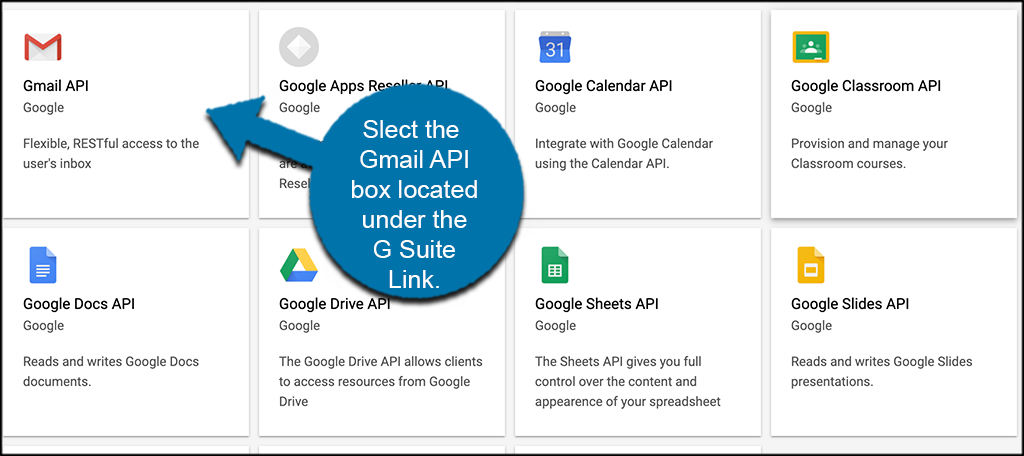
Find the Gmail API box located under the G Suite link. When you see it, go ahead and click on it.
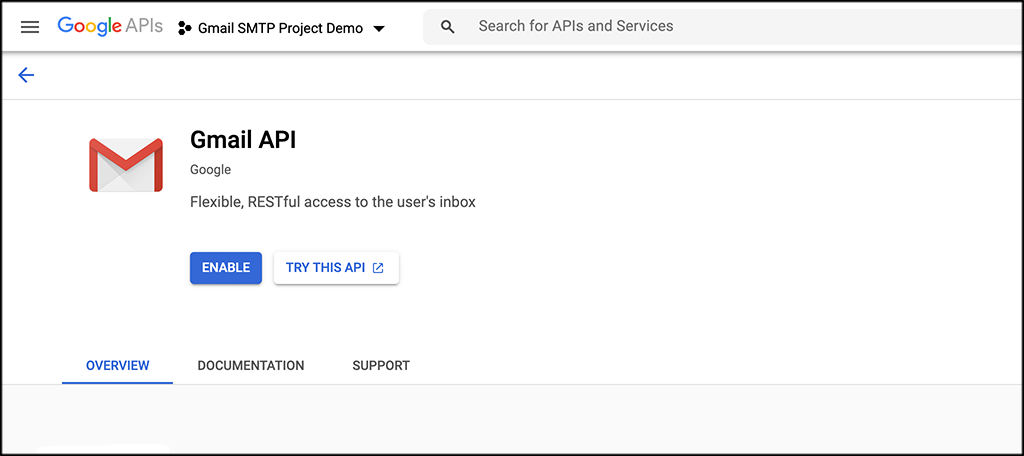
When you do, an informational page will come up telling you about everything. Feel free to read through the info. When you are ready, click on the “Enable” button.
Step 5: Create Credentials / App
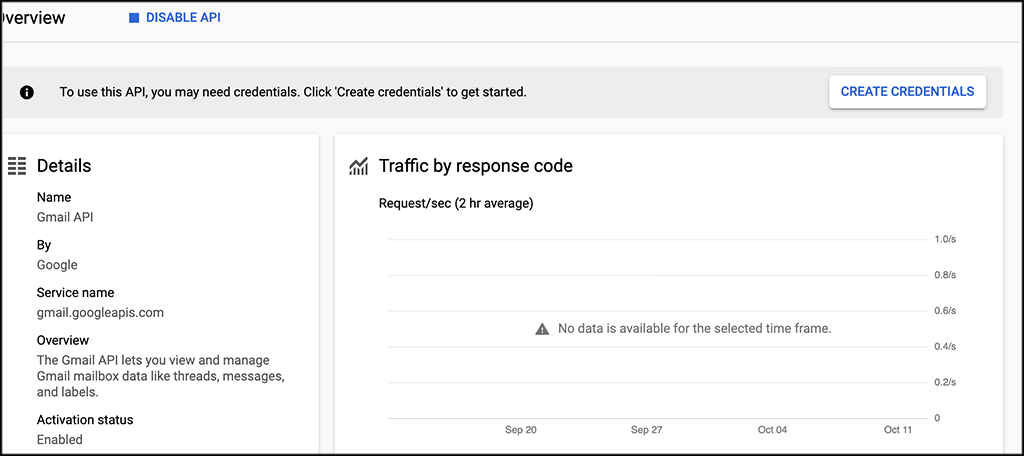
Now that you have enabled the API, you will be taken to a new window with a warning about how the API can’t be used until you create credentials.
Let’s get this part of the process started by clicking on the “Create Credentials” button link on the top right of the page
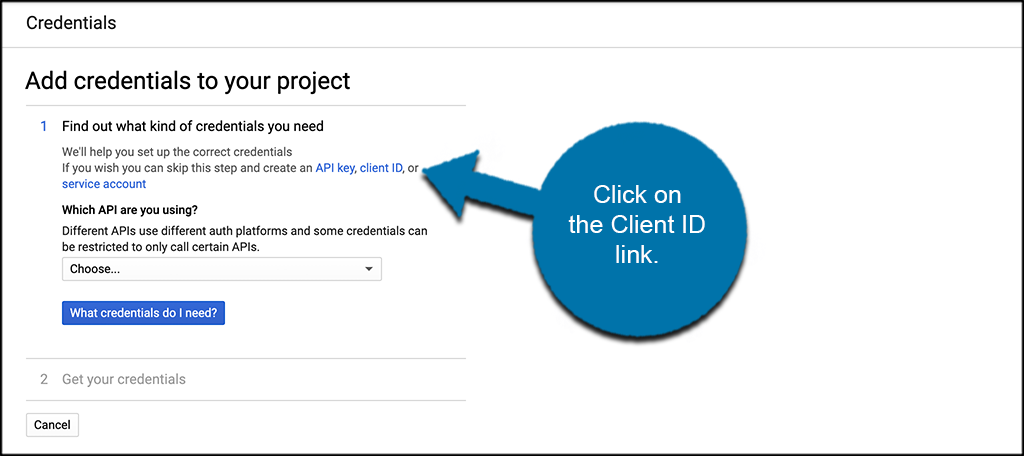
This takes you to an interface where you can find out the kind of credentials you need. You can use the tool to find out if you want, or you can skip it by clicking on the “client id” link.
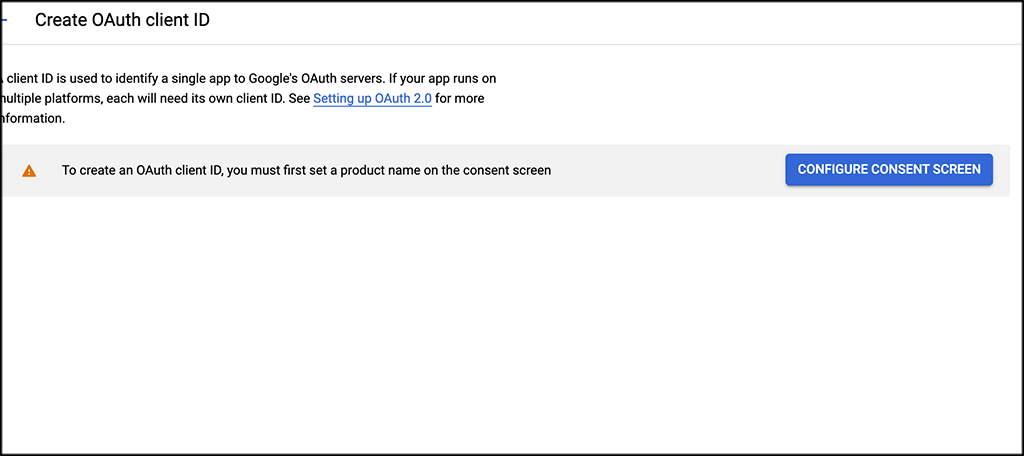
In order to move forward and create an OAuth client ID, you need to configure the OAuth consent screen first. So, click on the “Configure Consent Screen” link.
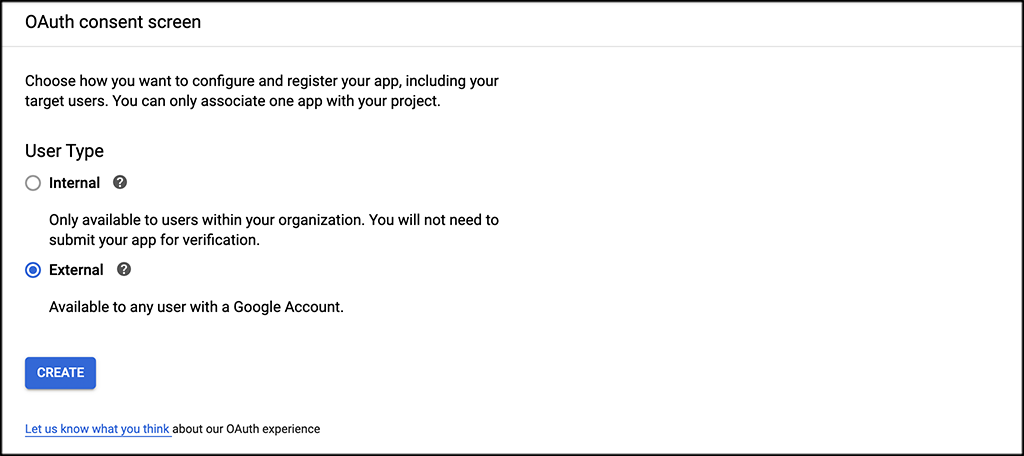
Doing this takes you to the OAuth Consent Screen. Here you have a couple of options. You can choose “Internal” if you want to limit email communication to only users of G Suite. Or, you can choose “External” so that you can make the app available to any user.
In this situation, I am choosing “External.” Click “Create” to move forward.
Step 6: Configure OAuth Consent Screen
At this point, you should be on the OAuth Consent Screen page. It is time to configure it how you see fit. Add an app name and user support email in.
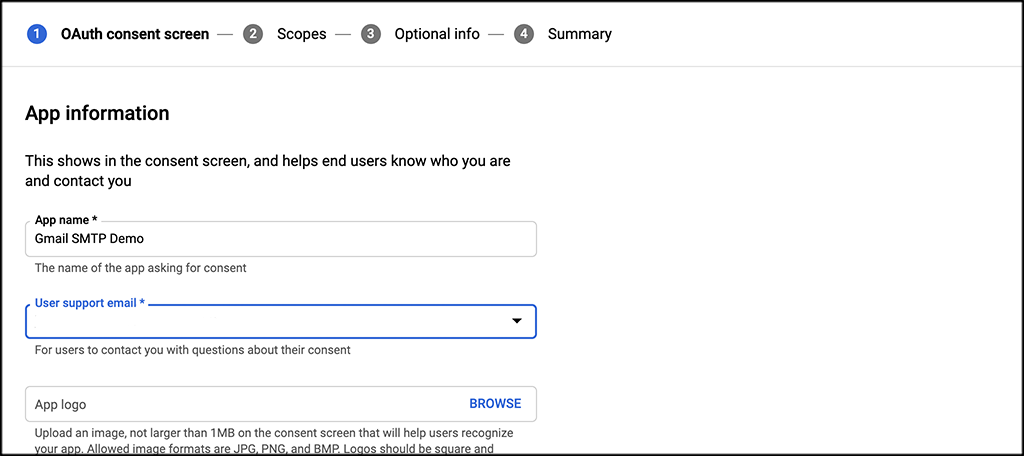
You can configure optional fields such as Authorized domains, Application Homepage link, Application Privacy Policy link, and Application Terms of Service link. This is all up to you, you can fill out what you want, or go ahead and click on the “Save” button to move forward.
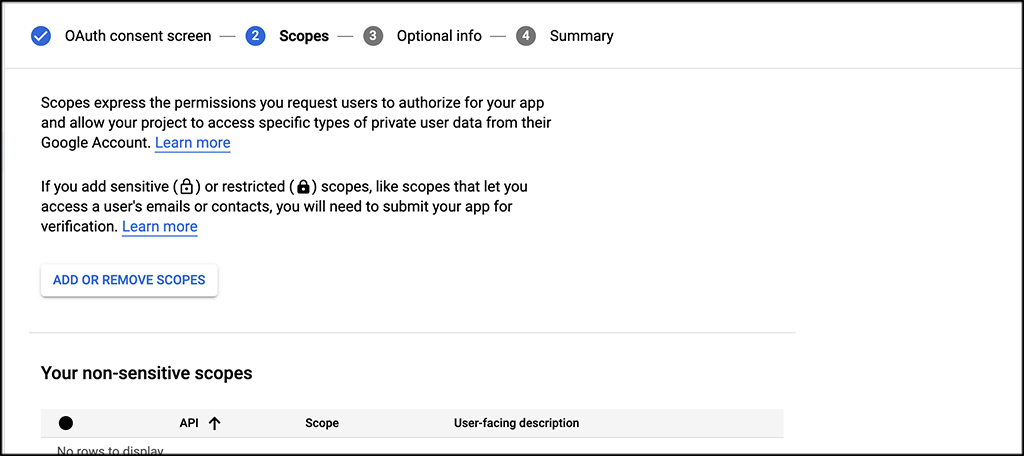
From here, go through Scopes, Optional Info, and the Summary. Again, you can fill this out however you want. I was able to just skip through all of it for demo purposes and I clicked on the “Save” button to move forward.
Step 7: Create OAuth Client ID
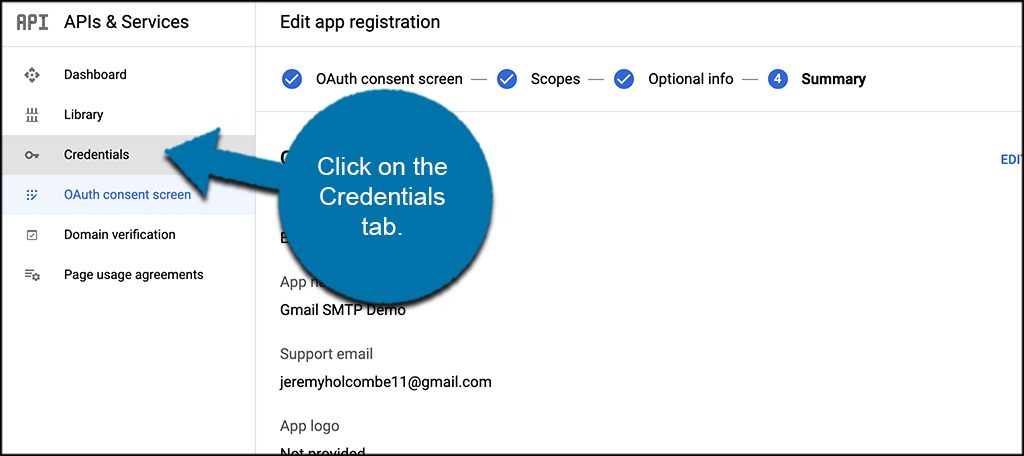
Now that the OAuth Consent Screen has been configured, you can create an OAuth Client ID. To do this, click on the “Credentials” tab located on the left.
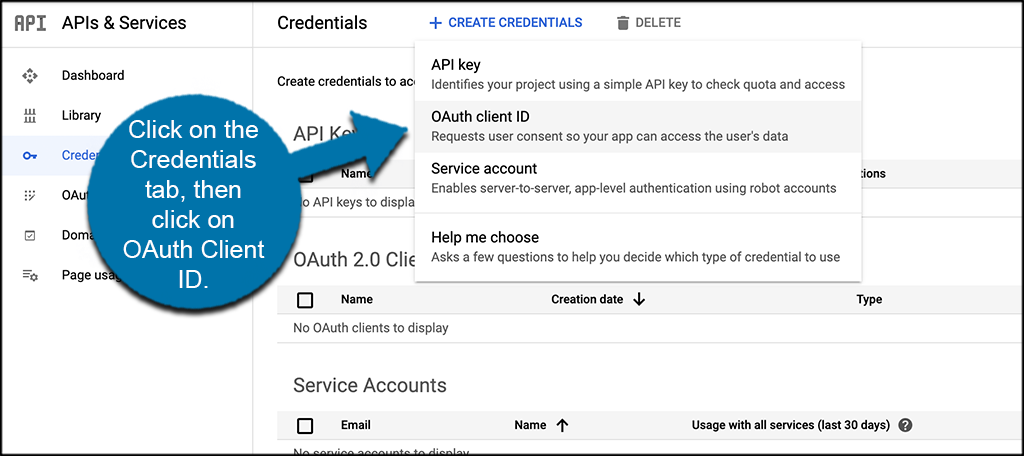
On this page, click on the “Create Credentials” tab at the top of the page. A drop-down menu will come out. Select OAuth Client ID from the selections available.
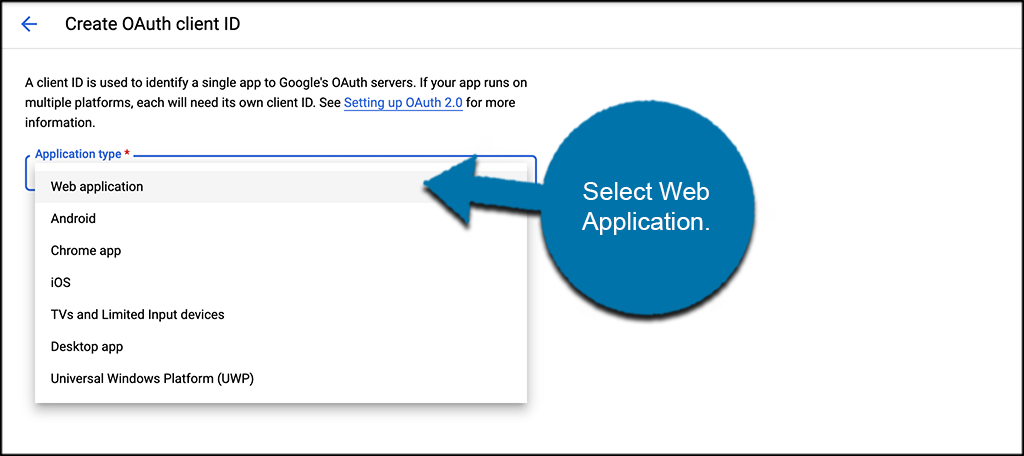
On the new page that pops up, select “Web Application” from the available drop-down menu.
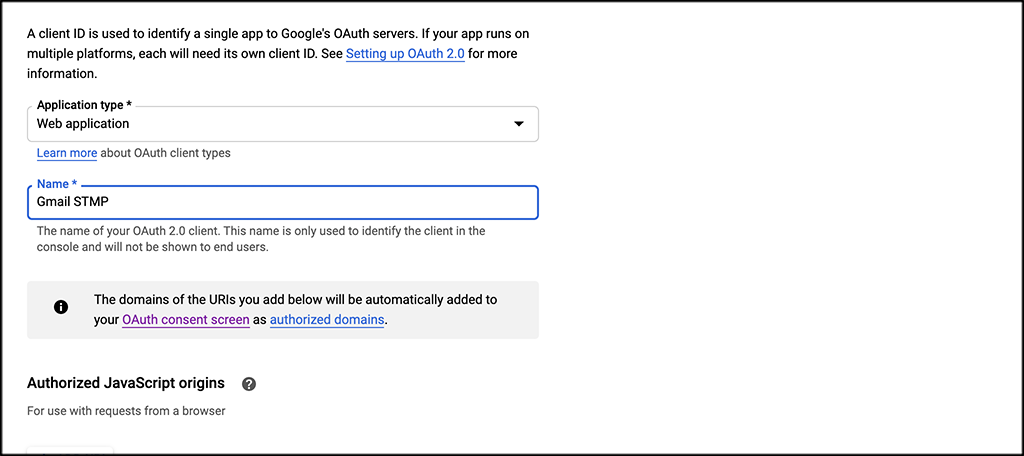
More relevant information fields will appear for you to fill out how you want. Go ahead and name the application and fill the rest of the fields out as you see fit for what you are doing. Make sure you authorize JavaScript Origins by entering the URL of your site.
In the field under “Authorized redirect URLs,” you will need to paste the URL that is displayed in the Gmail SMTP plugin settings. This is located just under the Basic Setup Instructions box.
When you are ready, click on the “Create” button at the bottom of the page. This will effectively generate a Client ID and Client Secret for you.
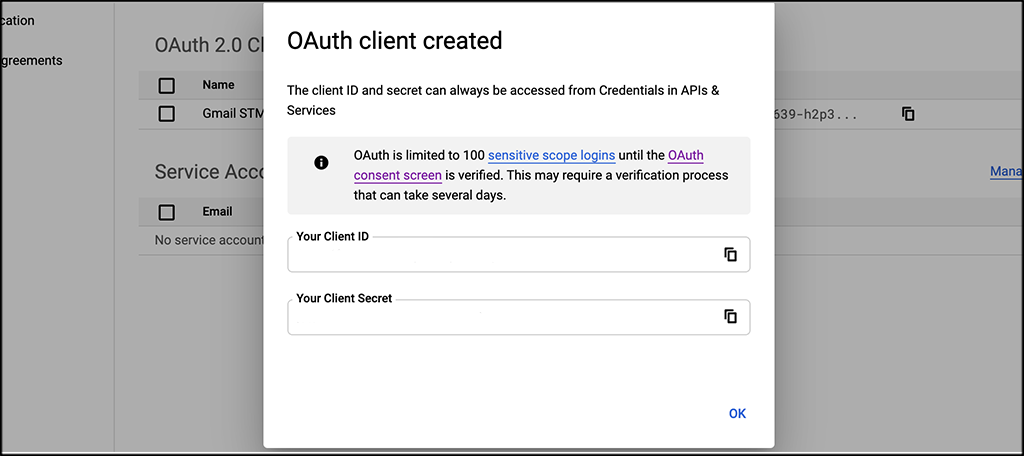
A new pop-up window will appear with your client ID and client secret. Copy both of these strings and paste them into your WordPress Gmail SMTP plugin.
Note: If you need these again in the future, you can go into the OAuth client in Google and edit the web application. Both ID and secret will be in this area.
Step 8: Add Gmail Credentials for SMTP Email in WordPress
Now that you have the SMTP set up for Gmail, go back to the WordPress plugin to input your settings. Complete the empty fields such as email address and “From name.” These are all located under the “General” tab.
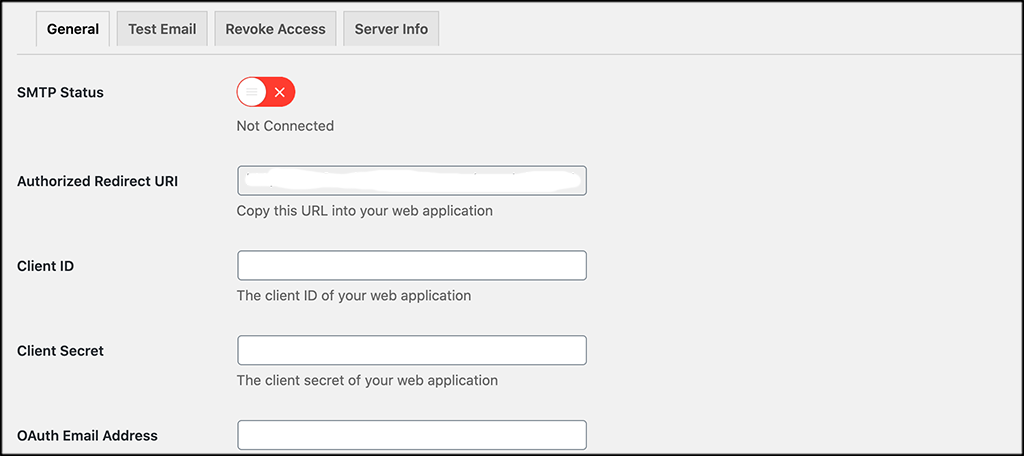
Take note of the following entries under the general tab and what they mean. This will help you enter the info properly.
- OAuth Email Address: The email address that you will use for SMTP authentication. This should be the same email used in the Google Developers Console.
- From Email Address: The email address which will be used as the From Address when sending an email.
- From Name: The name which will be used as the From Name when sending an email.
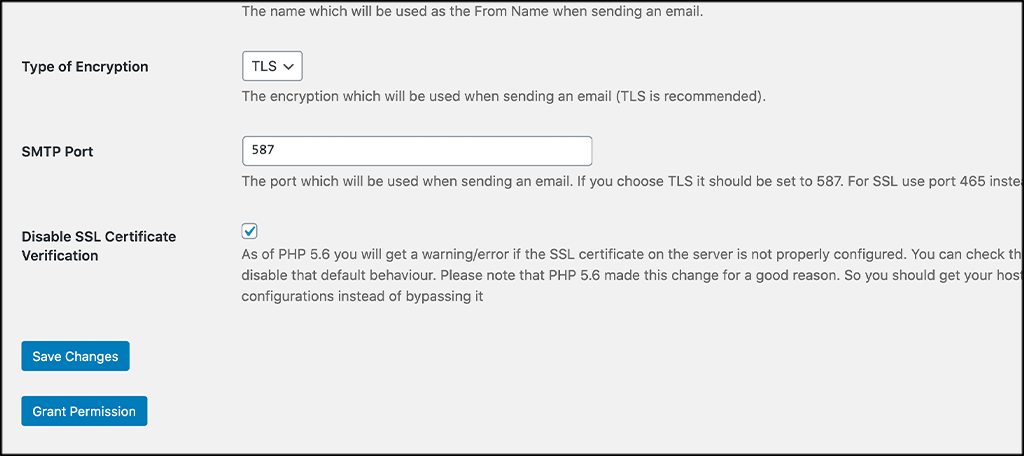
- Type of Encryption: The encryption which will be used when sending an email (either TLS/SSL). By default, it should be set to TLS since SSL has been deprecated since 1998.
- SMTP Port: The port which will be used when sending an email. If you choose TLS it should be set to 587. For SSL use port 465 instead.
When you are done here, click on “Save Changes.”
Step 9: Grant Permission
When you click on “Save Changes,” a new button may appear at the bottom of the page and will be labeled “Grant Permission.” Click this button.
Google will then ask for your permission to link the site to your Google account. Click the “Allow” button and you will be taken back to your Gmail SMTP settings window in WordPress.
Congrats! Your email is now connected to the website through SMTP and you are ready to send emails using WordPress
Can You Use a Free Gmail Account, or Should You Pay for SMTP Services?
There is nothing wrong with using a free account when you want to use a Gmail SMTP server. However, using the G Suite from Google adds a great deal of functionality. For instance, you can get a custom email, tons of extra storage space, spam protection, integrated video meetings, and more for a low price.
And that’s not including the other services that are part of G Suite. It may be a good system to consider, especially if you operate in a team environment.
What if This Doesn’t Work and You Get an Error When Trying to Send an Email?
Some website hosting platforms may have issues when trying to use a different server other than their own when using Gmail SMTP. As a result, the username and password may fail. If this happens, you will need to make a few minor adjustments in your cPanel.
Scroll down and click on the “Email Accounts” link in cPanel.
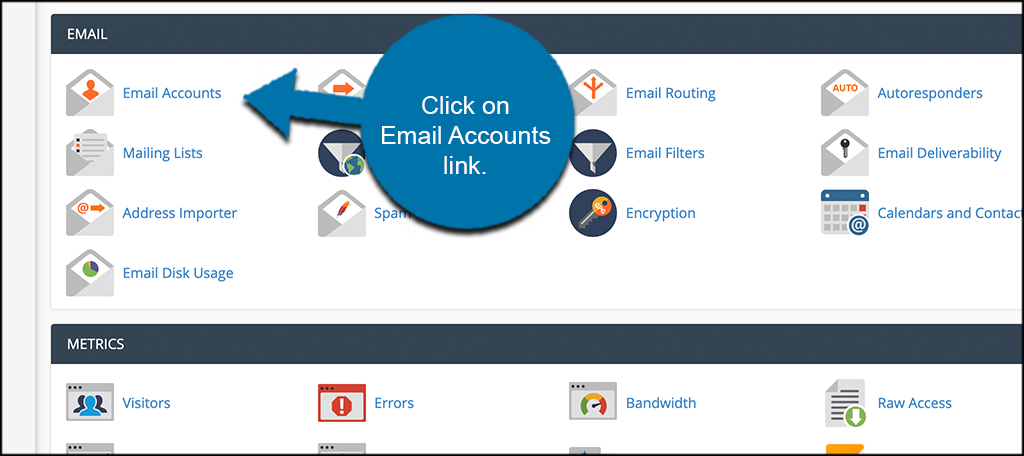
From here, create an email address the same as the one used in the credentials of your web application in Google.
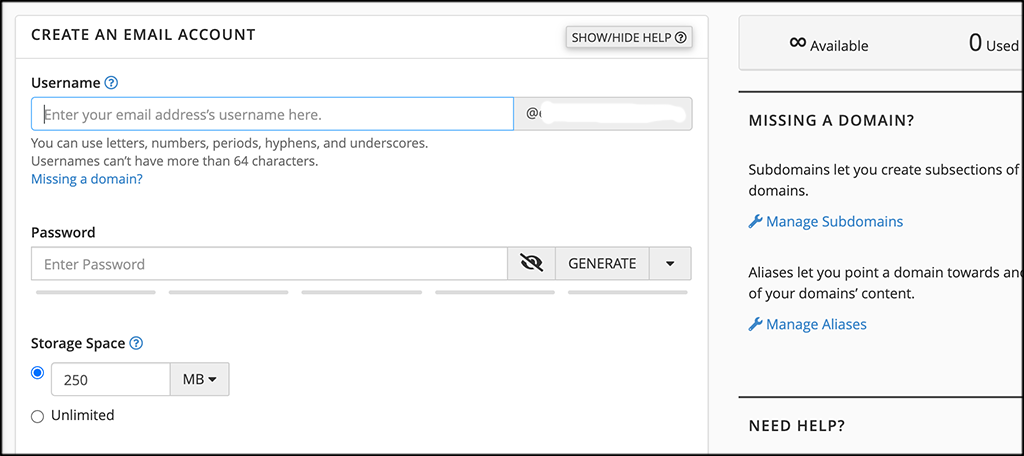
Now, go into your MX Records and change the routing from automatic to remote. There should be a link located next to MX that reads, “Email Routing: Remote Mail Exchanger.”
Note: This may differ from host to host, so check with your website host for troubleshooting from here if needed.
This essentially fools your website server into thinking you’re sending the message through it even though you really aren’t. This may not work for everyone, but it may be a good place to start should you encounter problems.
Other Gmail SMTP Plugins to Try in WordPress
WP Mail SMTP by WPForms
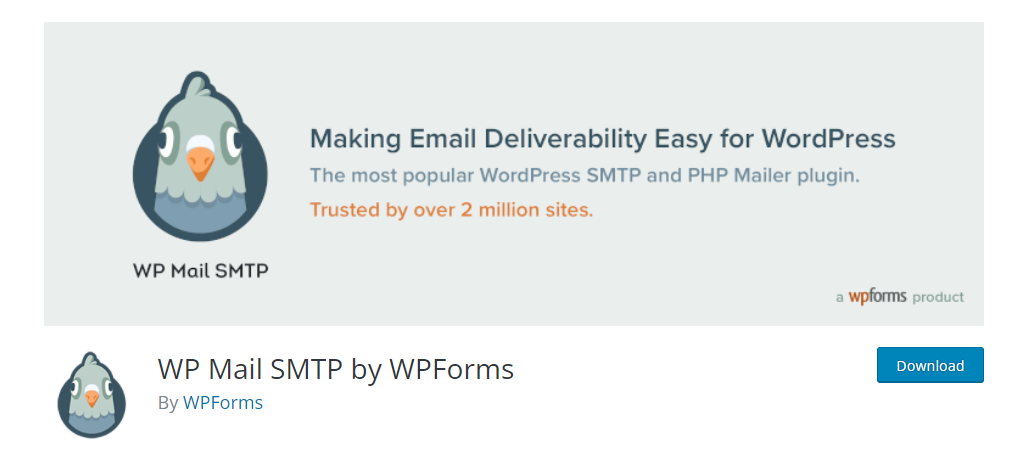
Without a doubt, WP Mail SMTP by WPForms is the most popular SMTP plugin in WordPress with over 2 million active installs. It handles multiple types of emails including Gmail, Yahoo, Zoho, and more.
As a result, the plugin will fit in on any website that installs it. It’s also pretty easy to use, which is a big reason it is so popular. And naturally, it integrates nicely with WPForms.
Easy WP SMTP
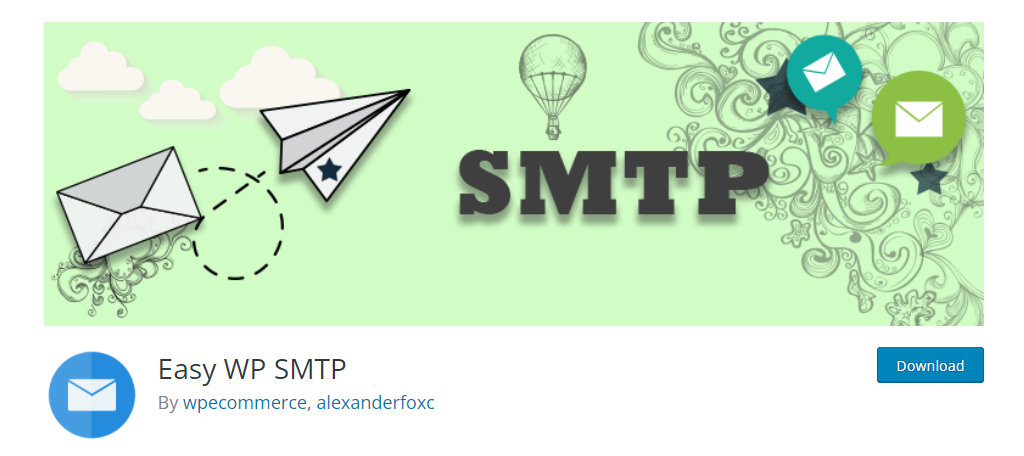
Easy WP SMTP is another multi-SMTP plugin. It supports Gmail, Yahoo, and Hotmail SMTP protocols. And as the name suggests, it is pretty easy to use. That’s why it has over 600,000 active installs.
It’s also worth mentioning that there is a Pro version. Thus, even more features and SMTP support are available.
Post SMTP Mailer/Email Log
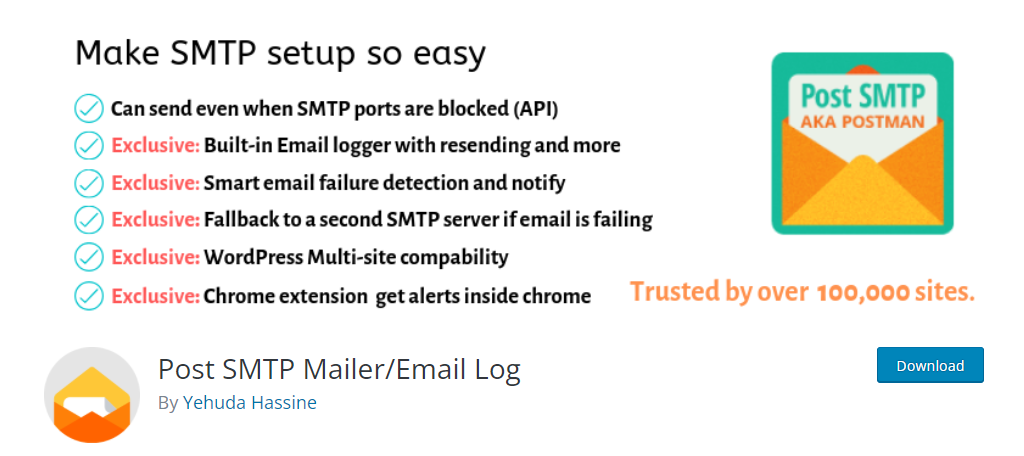
The Post SMTP Mailer/Email Log is a pretty interesting plugin. It has some very unique, but welcoming features like email notifications with the Google Chrome browser. It supports Gmail, Yahoo, and Hotmail protocols.
It’s compatible with most major WordPress plugins like WooCommerce and WPForms.
Setup Gmail SMTP in WordPress Today
Email is one of the most frequent pieces of communication on the Internet. Although the default PHP system in WordPress may work great in some instances, it may be hindering your success in others.
Deliver stability and security to your website mail functions. It may just make a difference in how people interact with your messages.
What kind of email server do you use professionally? How often do you send emails directly from your website?


Great post, thanks for working on this topic!
Thank you Tamas!
My project in xampp(Localhost). So how to fill up authorized javascript origine?
It clashes with gravity forms and breaks the submit button. End up going to a white screen with ajax off or a constant spinning button with it on. Any other recomended smtp plugins? preferably that dont require the password to the gmail in plain text in the settings lilke others (wp smtp mail cough cough)
Helo
I use business gmail and setup Gmail-SMTP on my WordPress site. It need 02 mins to send the email. I don’t know what problem why too long. Do you have the solving?
Thank you