Have you ever tried to change the appearance or functionality of the default WordPress login page? If so, you know it can be a complicated job that involves editing core WordPress files. The good news is, there’s a plugin for that! We’ll use the LoginPress Custom Login Page Customizer to do the job.
Making Your WordPress Login Page Unique
If you’re the only WordPress user for your site, you probably never gave much thought to the default login page. But if you have other users or contributors, you may want the login page to better match your website design. Or, you may just be looking for a way to improve your user’s experience.
LoginPress makes those kinds of changes easy. Not only can you change the appearance of the sign-in page, but you can also even change the default messaging. That’s something that would otherwise require complicated changes to the WordPress login files and single-handedly justifies installing the plugin.
How to Add LoginPress to WordPress
Let’s install the plugin and see how it works.
1. Installing the LoginPress Plugin
Log in to your WordPress admin panel.
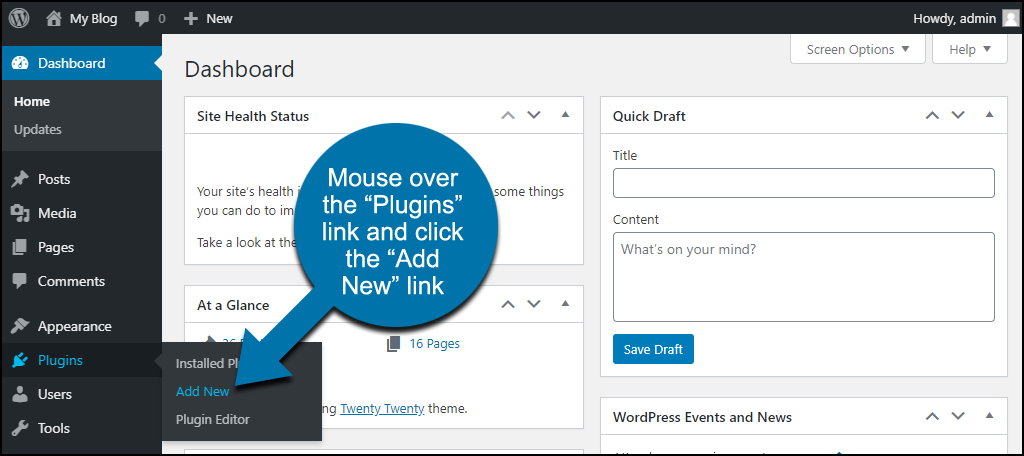
In the left column navigation, mouse over the “Plugins” link and click the “Add New” link.
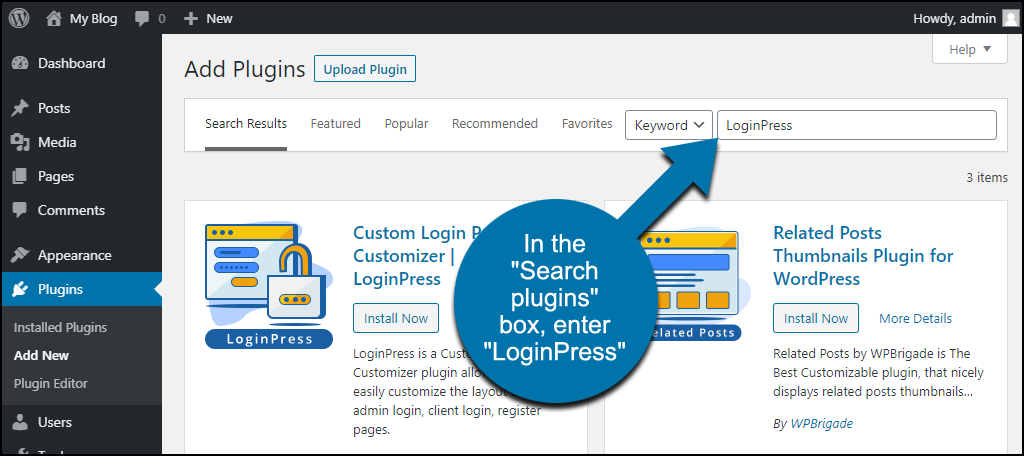
In the “Search plugins…” box, enter “LoginPress.”
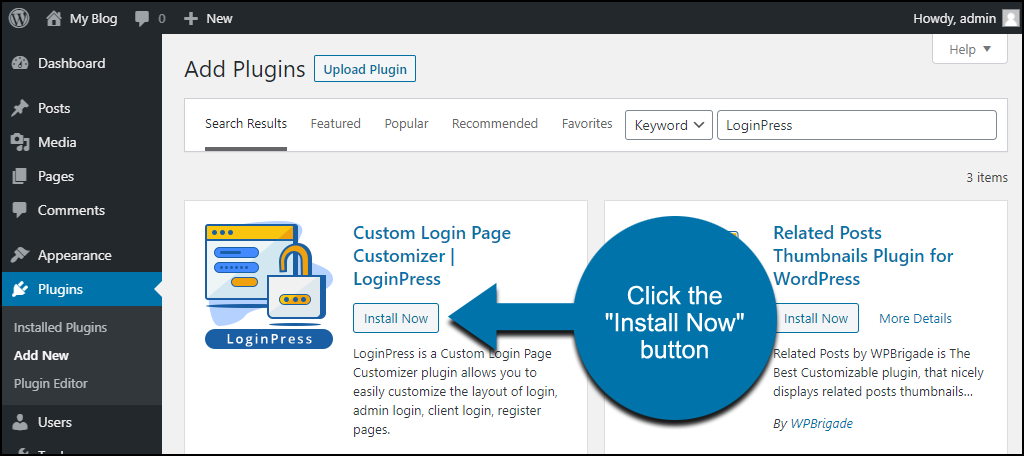
When you find the plugin, click the “Install Now” button.
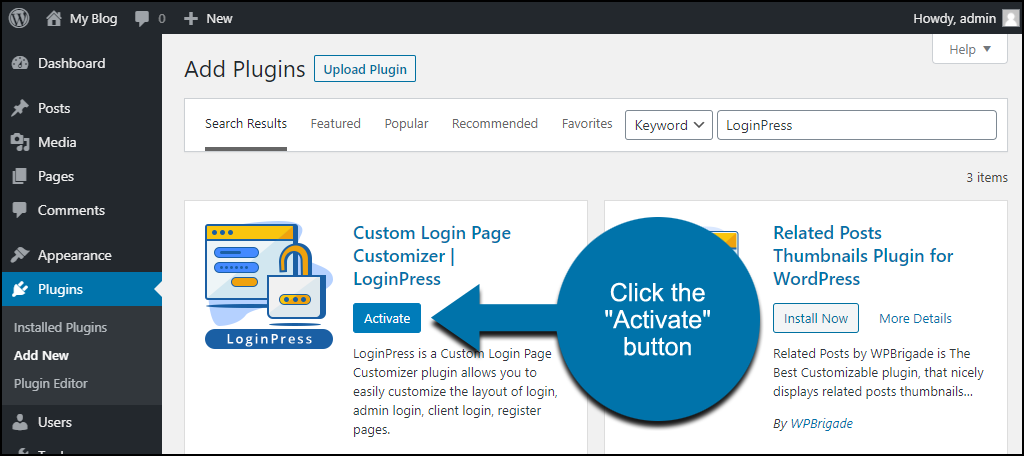
Now the plugin is installed, but it has to be activated before you can use it.
Click the “Activate” button.
That completes installation and activation. Now let’s move on to getting the plugin up and running on your website.
2. Configuring LoginPress
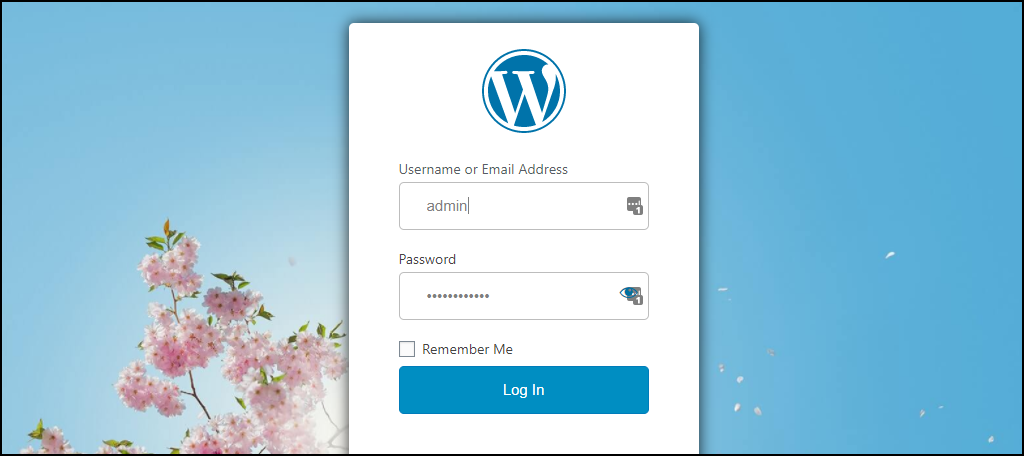
As soon as the plugin is activated, it adds a background image to your login page.
Before you make any changes to the login page, there are some default configurations that you may want to adjust.
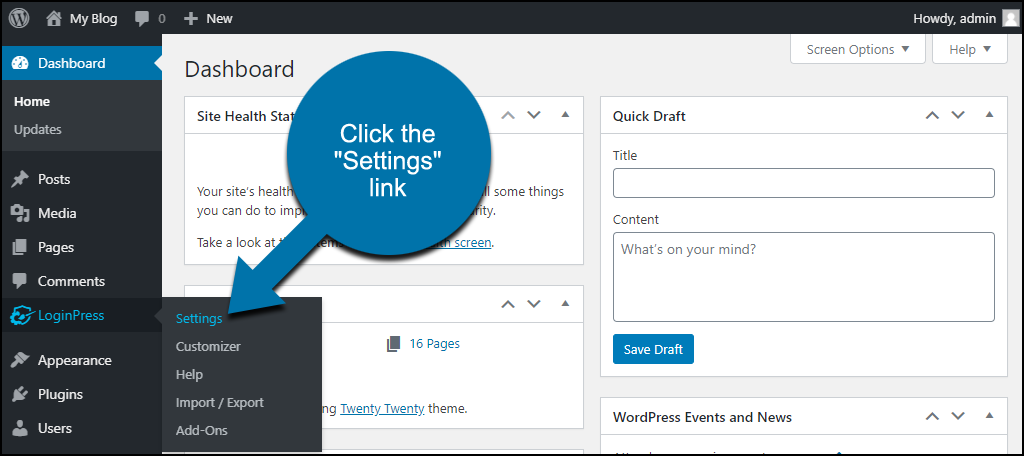
In the left column navigation, mouse over the “LoginPress” link and click the “Settings” link.
The first time you access the plugin, it will ask for your permission to collect data about your site. If you prefer not to send your site data, click the “Skip This Step” link.
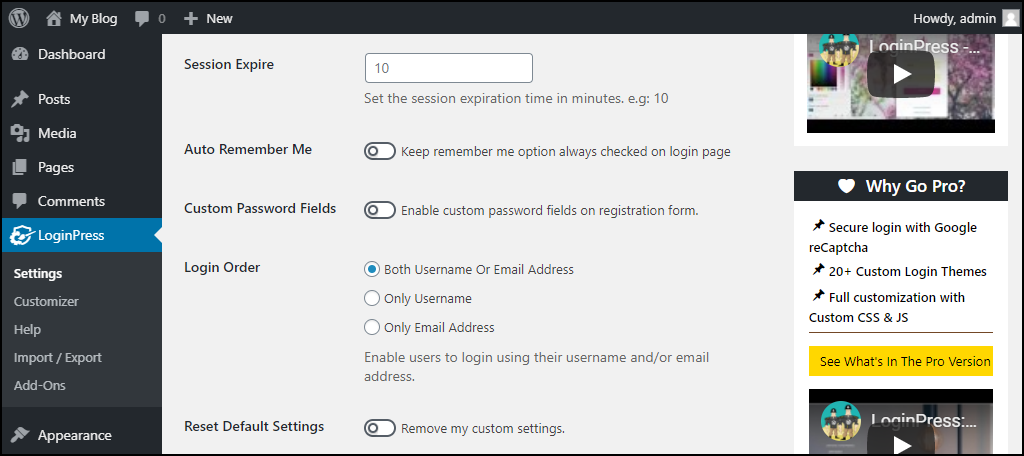
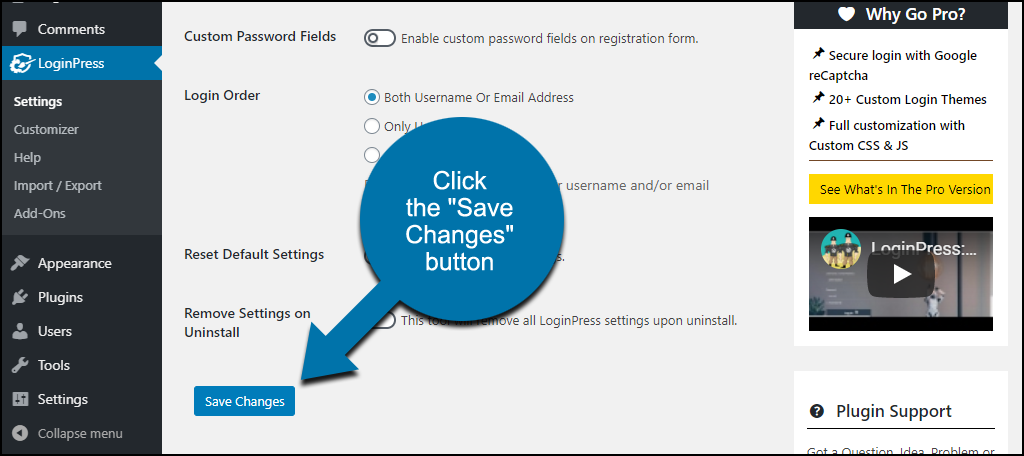
The “Settings” page gives you access to half a dozen settings.
- Session Expire sets the admin session expiration time in minutes. Meaning if there’s no activity in the admin section for XX minutes, you’ll be logged out. By default, no timeout is set.
- Auto Remember Me lets you pre-select the “Remember me” option on the login page. It is disabled by default.
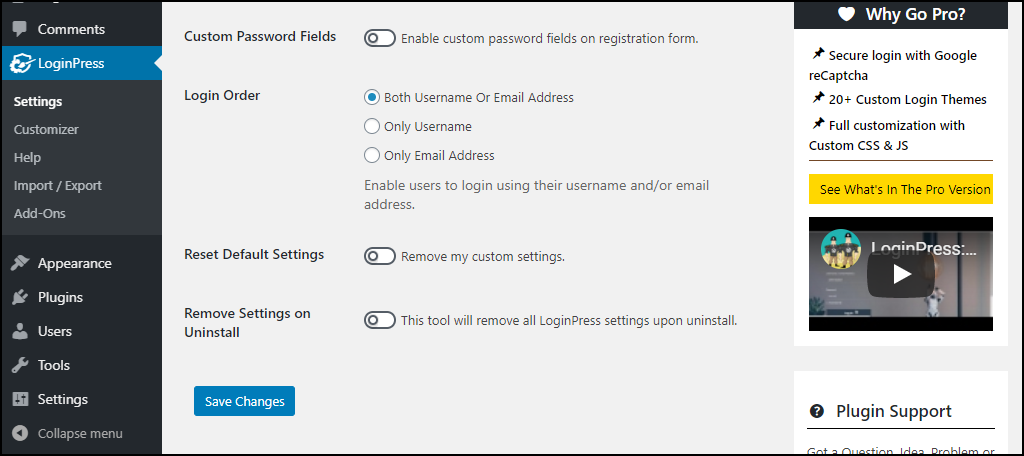
- Custom Password Fields allows you to add custom password fields to the registration form. It is disabled by default.
- Login Order lets you choose whether to ask for the username or email address to log in (or both).
- Reset Default Settings deletes any customizations you’ve made and resets the default plugin values.
- Remove Settings on Uninstall deletes database tables when the plugin is uninstalled. It is disabled by default, so the plugin settings will remain if the plugin is uninstalled.
Click the “Save Changes” button if you make any changes to the settings.
3. Changing the Background of Your Login Page
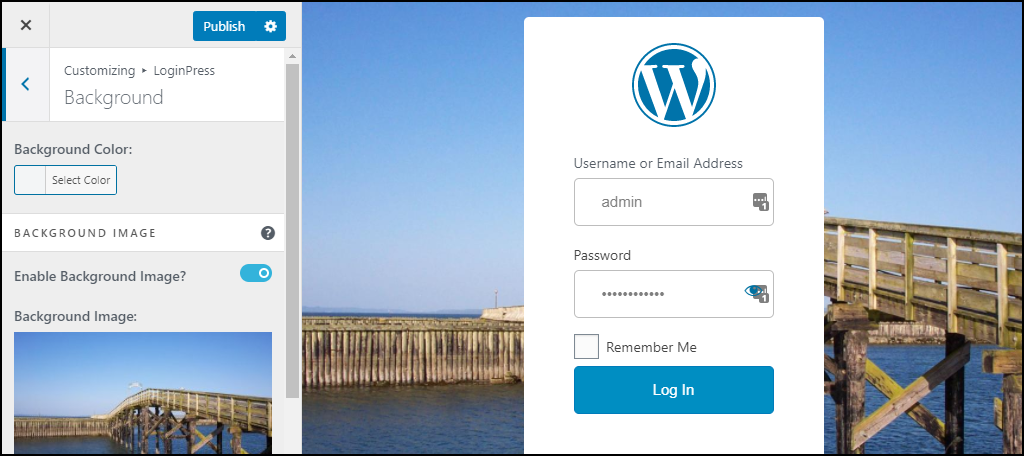
The background image the plugin has provided is lovely, but let’s change it and get started on our custom login.
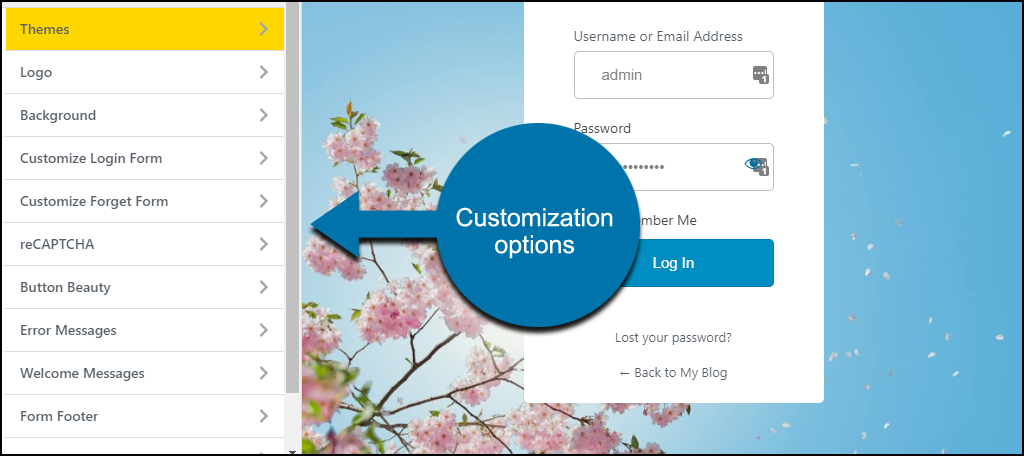
The changes to the appearance of the form are made in the WordPress customizer. To access it, in the left column navigation, mouse over the “LoginPress” link and click the “Customizer” link.
There are a lot of options available. Some of them require that you buy the “pro” version of the plugin. We’ll focus on what’s available in the free version.
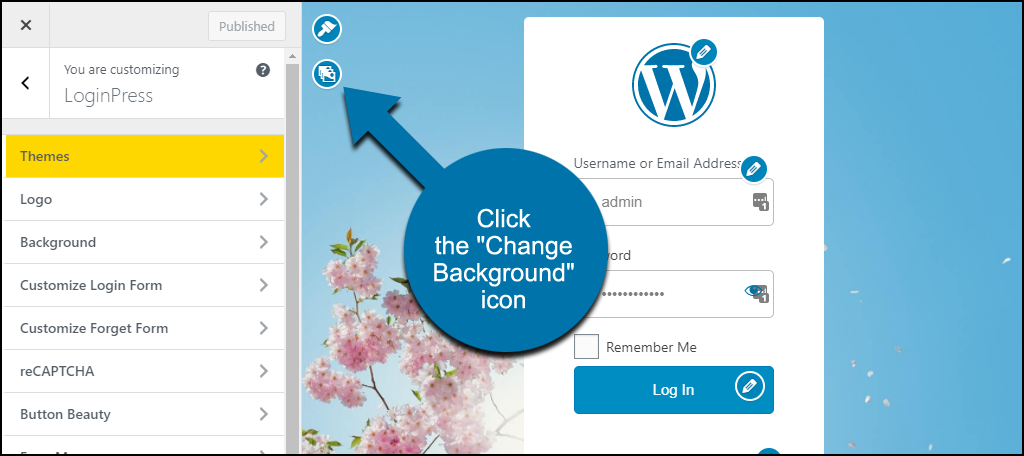
For quick access to certain features, mouse over the login page preview. You’ll see a number of editing links appear.
We’ll click the “Change Background” icon first.
There are a number of images provided by the plugin. You can click one of them to load it into the preview.
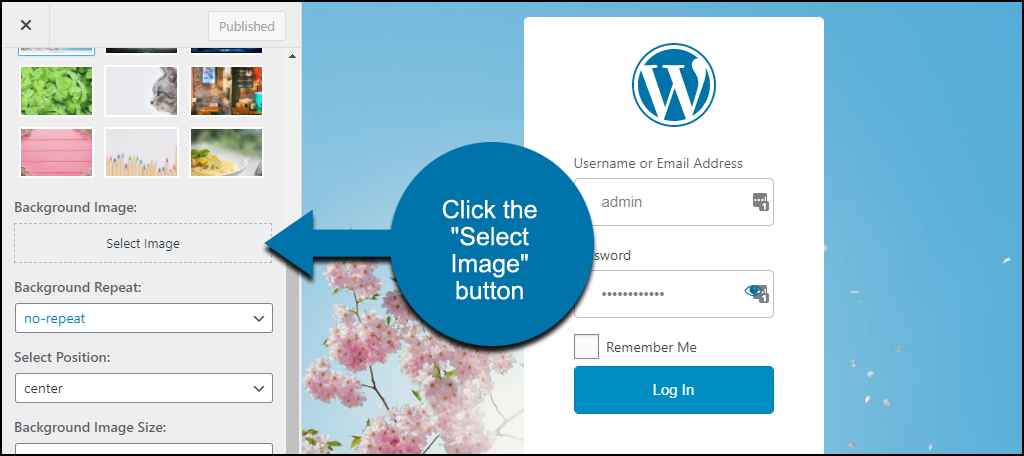
But you can also provide your own image, either via upload or from the Media Library.
In the left column, scroll down and click the “Select Image” button.
That will open the WordPress image overlay, letting you either upload an image or choose one from the Media Library.
I’ve chosen an image from the Media Library and added it as the background.
To save your changes at any time, click the “Publish” button in the left column.
In addition to setting a page background image, you can also set a second image as the form background.
4. Alter the Login Form’s Background
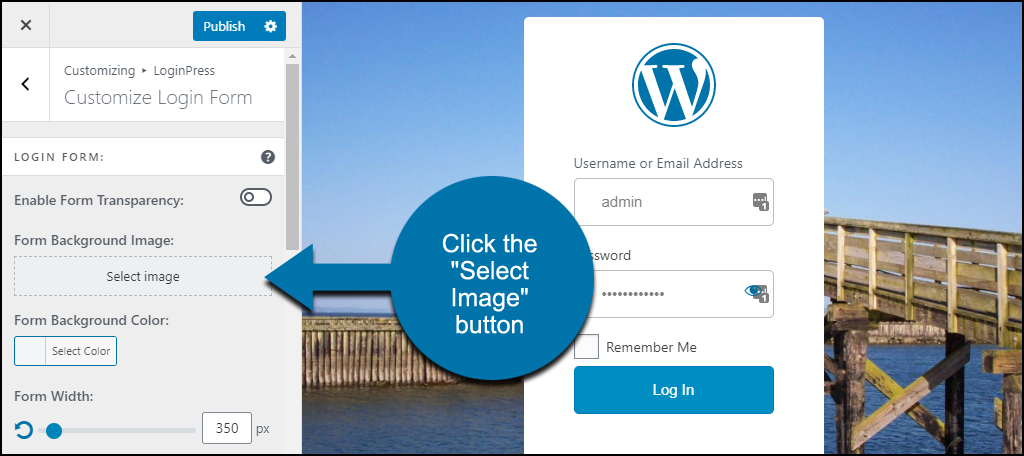
Click “Customize Login Form” in the left column.
Then under “Form Background Image,” click the “Select Image” button.
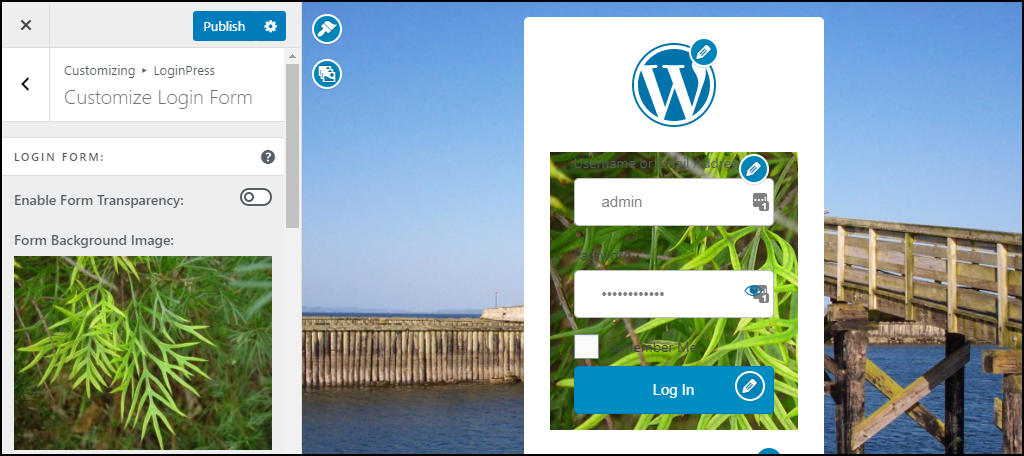
Here, I’ve selected another image from the Media Library, and it becomes the form background.
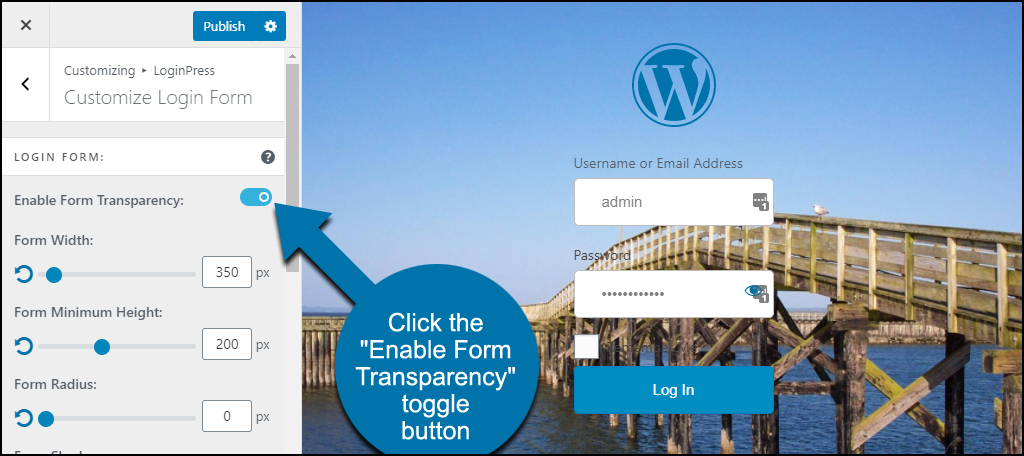
While we’re still in the “Customize Login Form” section, there’s another way to feature your page background image.
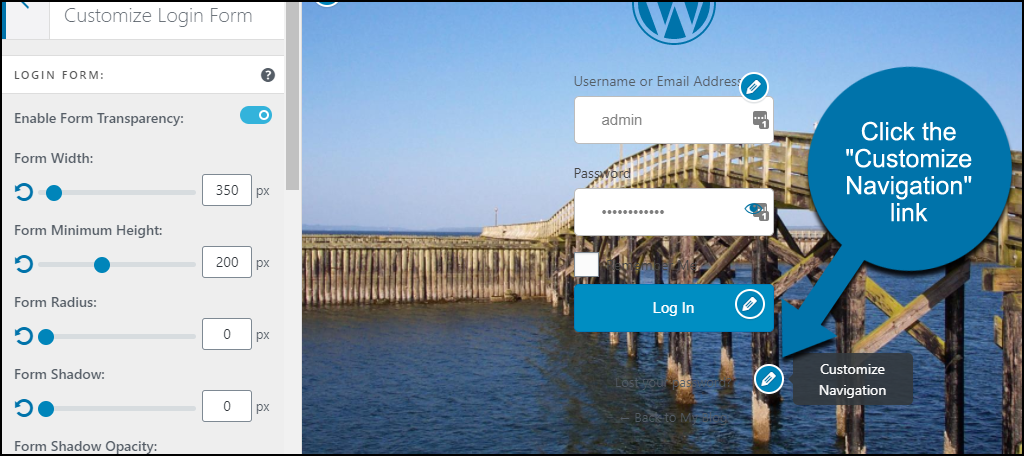
Click the “Enable Form Transparency” toggle button and look at what happens.
5. Changing the Login Page Text Color and Size
That transparent form is pretty cool, but now we can’t read all the text around the form.
We’ll fix that by changing the text to a lighter color and making it bigger and easier to read.
Mouse over the preview and click the “Customize Navigation” link.
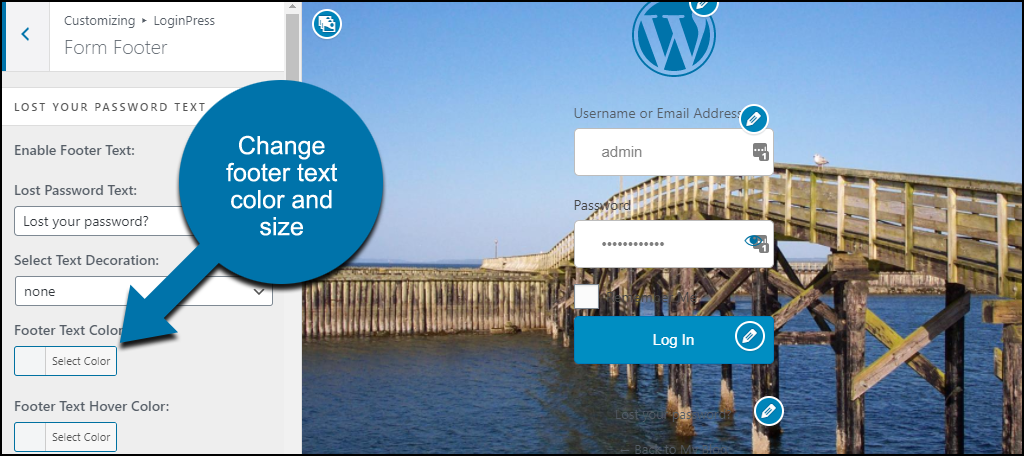
In the left column, we’ll change the color of the footer text and increase the font size.
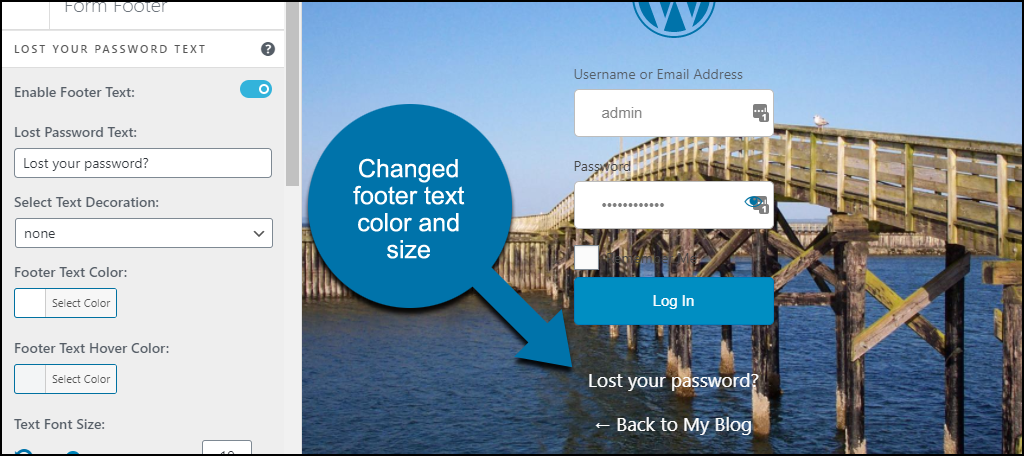
Now the “lost password” and “back” links are legible and more prominent.
6. Changing Other Page Elements
Every element of the page can be changed in the same way we changed the background images and form text. Here are just a few of the highlights.
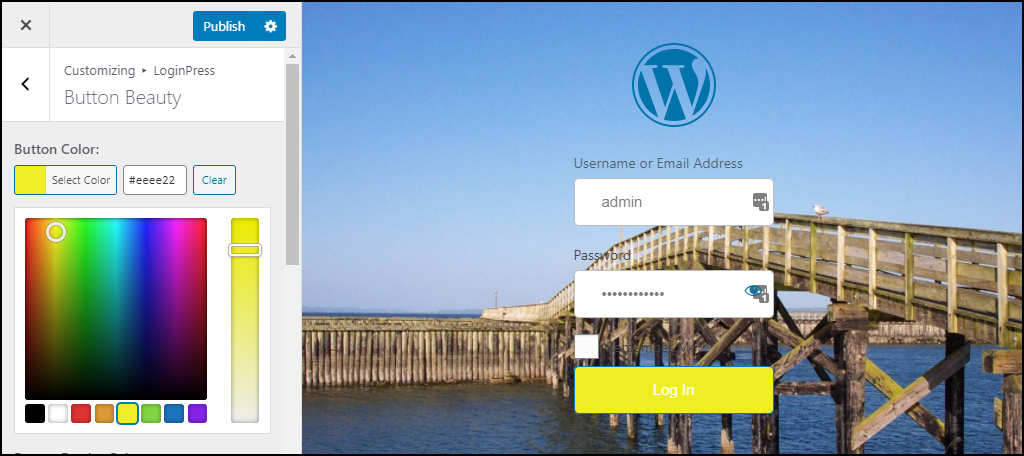
The button color, size, and padding can be changed:
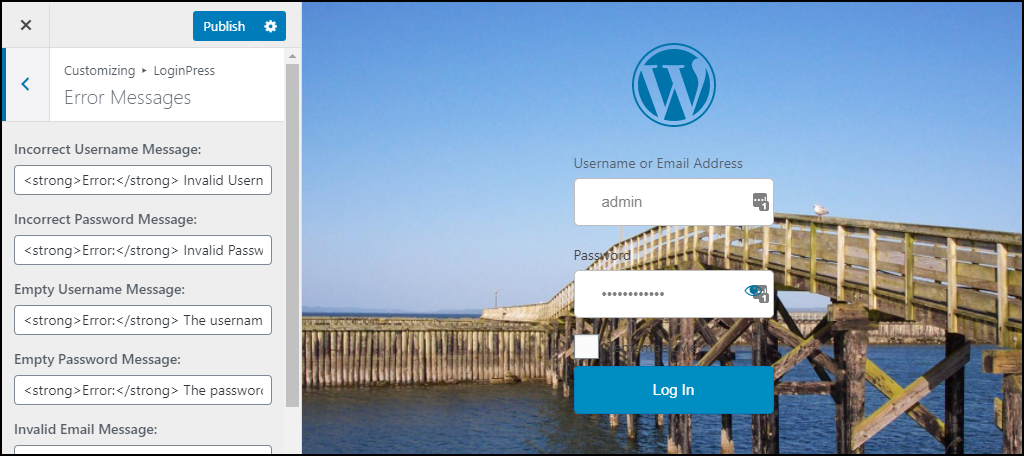
All of the login form error messages can be edited:
All of the login form dialogs can be edited:
Virtually every element of the login, registration, and lost password pages can be changed and adjusted. Including:
- Logo
- Background
- Login form
- Forgotten password form
- Buttons
- Error messages
- Welcome messages
- Form footer
What Happens if You Uninstall the LoginPress Plugin
If you uninstall the plugin, your login page will revert to the default WordPress login.
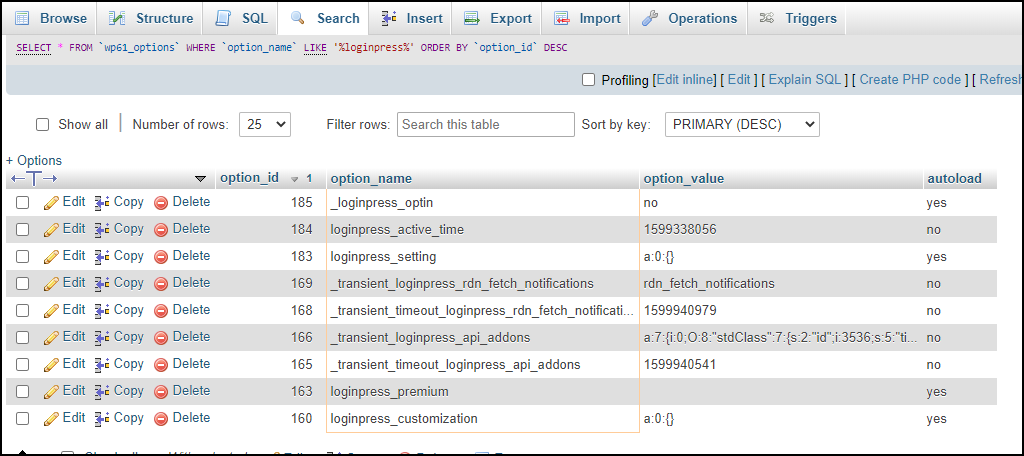
The plugin creates entries in the options database table that are not removed when the plugin is uninstalled. (Even if you activated the “Remove Settings on Uninstall” setting.)
If you need to delete the database entries, look the option rows containing “loginpress.”
Here’s what they look like in phpMyAdmin:
It’s Never Been Easier to Customize the WordPress Login Page
All WordPress plugins use server resources and can potentially add time to page loads. But considering how easy login page changes are with LoginPress, the tradeoff may be justified.
When you consider what’s involved with manually making login page changes, you can see the benefits of using LoginPress. It will save you a serious amount of time and trouble.
The paid version of the plugin is a bit pricey as far as plugins are concerned. But the “Startup” tier and higher boasts some impressive add-ons. Social account logins, a login widget, the ability to limit login attempts, hide the login, and even automatically log in users.
With those added features and the time-savings the plugin provides, this is one “pro” upgrade that I can recommend.
Have you ever tried to make manual changes to your WordPress login page? Could you benefit from easy login page customization?
As always, let me know in the comments. I’d love to hear from you.

