Backups are extremely important when you need to make large changes to your website. They allow you to create an exact copy of what your website is like and if you need to, you can restore that particular state of the website at any time. One of the biggest WordPress backup solutions available to you is using scheduled backups and this method is utilized by most websites today.
Backing up and restoring your website has never been easier with a large number of plugins available. There are many reasons to backup and restore WordPress and they include mistakes made when entering shortcodes, security attack recovery, or moving your website location. Today I will demonstrate how to restore your WordPress website from backups using BackupBuddy.
Why BackupBuddy can Help Backup Your WordPress Website
There are many advantages to backing up your website and BackupBuddy will be able to help you at every step. Before making any major changes to your website you should always back it up. It is a common practice because it guarantees you can easily fix any mistakes made.
You may also be in the process of switching web hosts and you will want to backup your website when switching. Unfortunately, sometimes the switching process is not as seamless as you want it to be and if there is something wrong with your new website you can try restoring it with your older copy. Just be sure to correct the URL changes.
Security is a major concern of any website and you will want to alway be on the look out for ways to improve it. Attacks can take your website out of commission for weeks if they are not properly dealt with. You can avoid all of this downtime if you restore your website.
How to Install and Use BackupBuddy in WordPress
Today I will demonstrate how to install and use the BackupBuddy plugin in WordPress. It is a premium plugin that has a lot of great features for backing up and restoring websites. It has a very easy to use interface and is one of the best WordPress full site backup plugins available. This plugin has been around since 2010 and is very well known and respected.
Before you begin it is extremely important that you understand that this is not a free plugin. You may purchase BackupBuddy here and the cheapest package will start at 80 dollars. There are multiple backup plugins that are free, but this tutorial will focus on BackupBuddy.
After you have purchased the plugin and installed it you will notice on the left-hand admin panel that there is a BackupBuddy option. Click on the BackupBuddy option.

This is the main page that will show you your backup history and when the last one occurred. It will also let you select which backup profile to run.

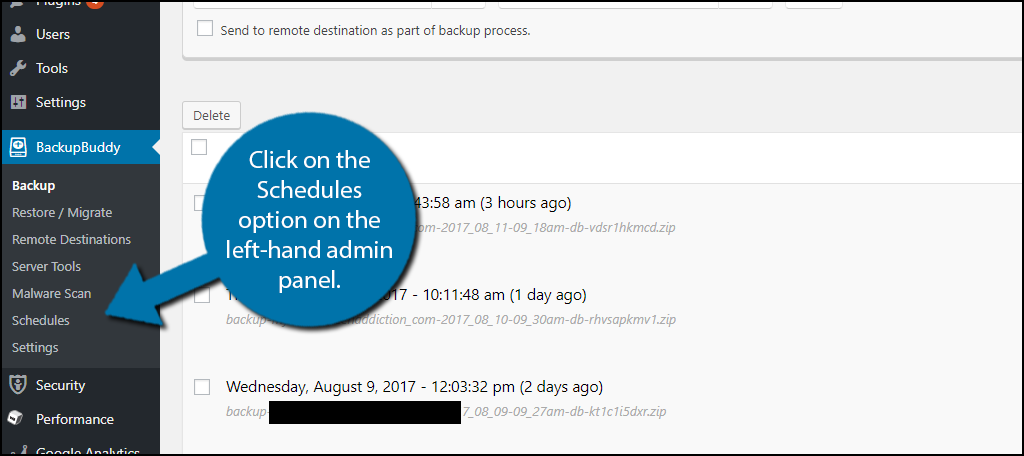
To set up scheduled backups click on the Schedules option on the left-hand admin panel. You will want to set up a schedule that works around the time when you add new content. For example, if you are a blogger that adds one new blog every week it would be a good idea to schedule a backup after you have added your new content every week.
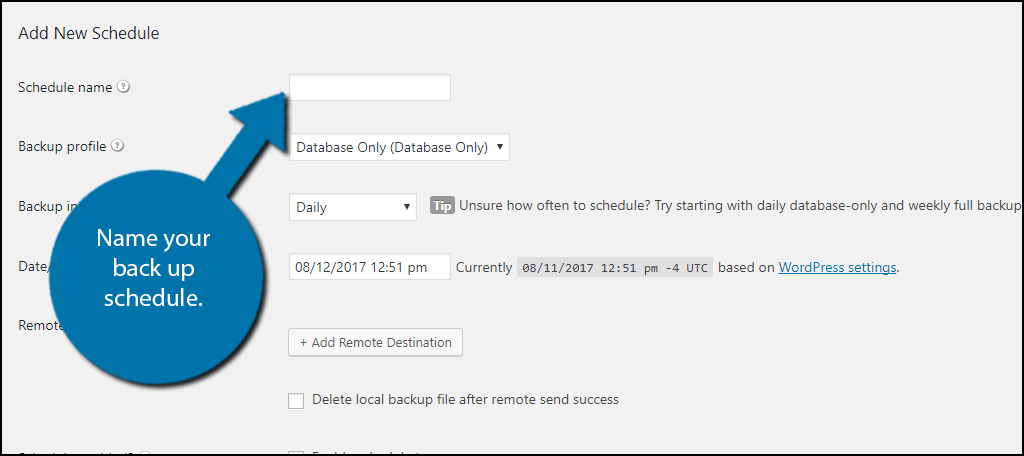
The Schedules page will display your current backup schedules and allow you to add new ones at any time. It is very simple to create a schedule and you will first want to name your backup schedule.
Next, you will want to choose your backup profile. You can choose between the database portion of your website or a full backup. If your site is on the larger side it may be a better option to only fully back up your website on a monthly basis.

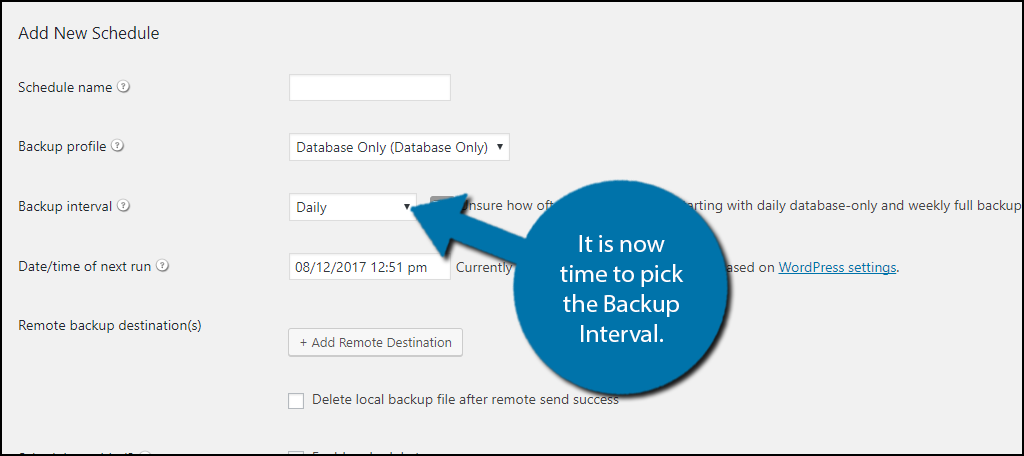
It is now time to pick the Backup Interval. This will give you many options to choose from, but remember that you want to create a schedule based on how often you update the website. There is no point in creating multiple backups of the same thing.
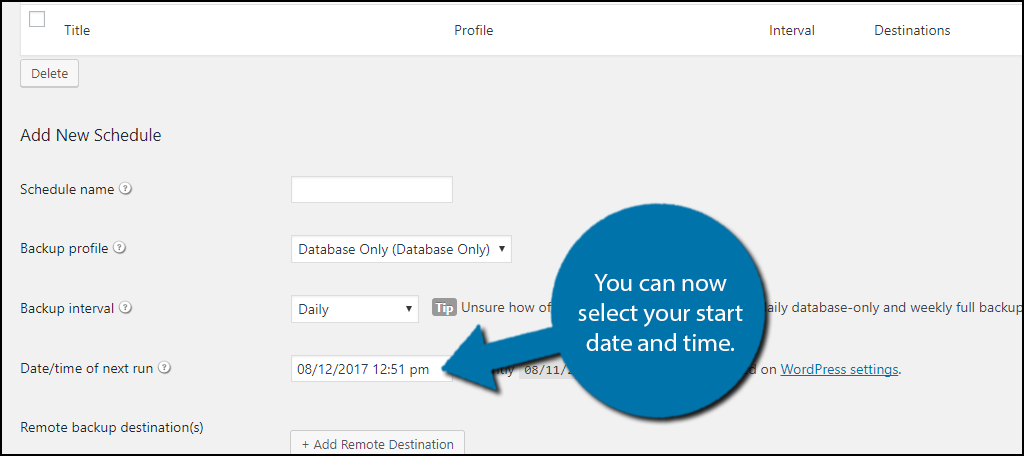
You can now select your start date and time. This is very important. If you want your schedule to happen every two weeks on Sunday make sure you pick the start date on a Sunday at a desirable time.
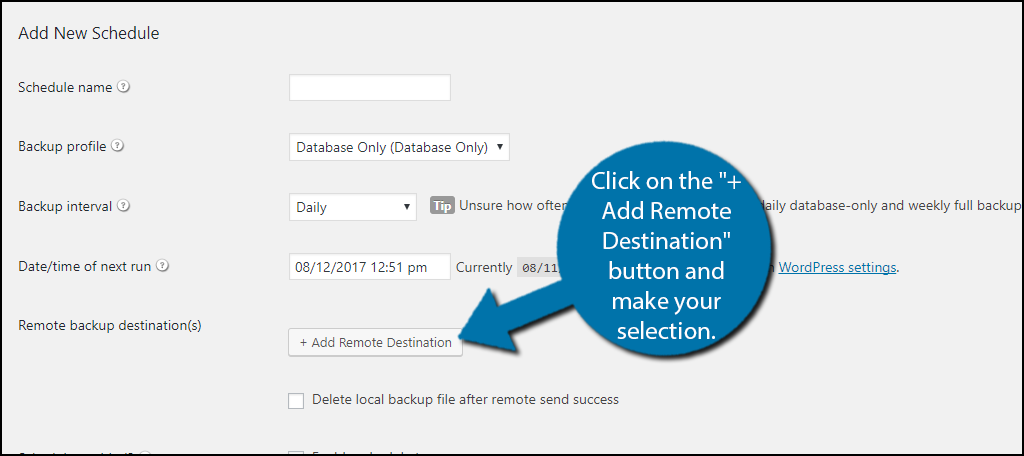
Before you are finished you must select where you will store your backup. Your package does include one Gigabyte of data if you choose the my stash option. Click on the “+ Add Remote Destination” button and make your selection. Remember you can create multiple scheduled backups that will be stored in different places. This will ensure that if one storage location fails, you can find it in another.
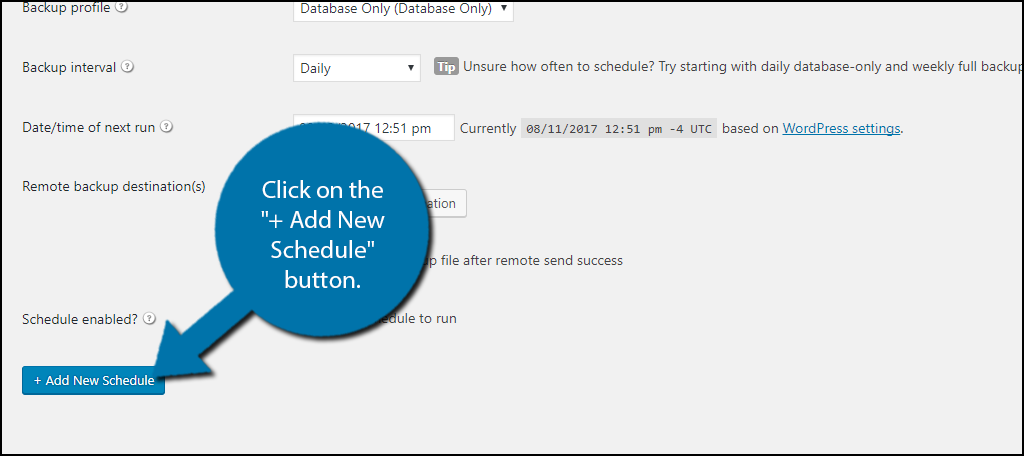
Make sure the Enable Schedule to run box is checked or your backup will not happen. Once you have filled in all of the information click on the “+ Add New Schedule” button at the bottom of the page.
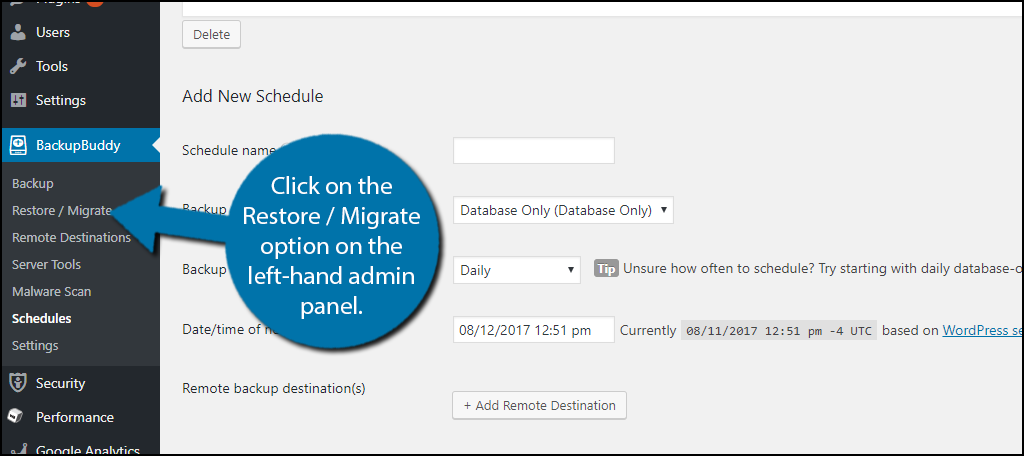
Backing up your website is only the first part. You must also know how to restore a backup. Click on the Restore / Migrate option on the left-hand admin panel.
On this page, you will see a full list of steps to restore your website to a previous backup file. It is very simple, just follow the steps and your website will be restored.

Congratulations, you have successfully backed up your WordPress website using the BackupBuddy plugin. You can create as many scheduled backups as needed. It is very important to always keep backups in case of a major incident that would cause extended downtime on your website.
Additional Plugins
There are many WordPress automated backup plugins available for use. Here are some additional plugins I can recommend trying.
VaultPress

VaultPress is another great backup plugin for WordPress. It is also a premium plugin and plans can be purchased here. It has similar functionality as all other backup plugins. If you want to create a backup and restore it, this plugin will definitely help you.
WP-DB-Backup
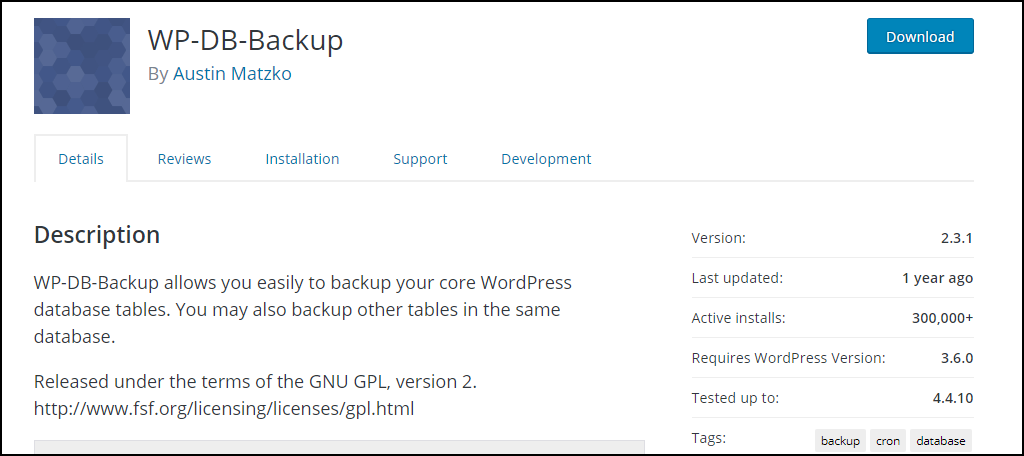
WP-DB-Backup is another very popular backup plugin for WordPress. It has over 300,000 active installs. It can back up your website very easily and is easy to use. It is a great plugin worth trying.
Keep Your Website Backed Up
WordPress automated backup plugins like BackupBuddy are like an insurance policy for your website. Backups will help you solve your mistakes, plugins’ issues, or even issues due to your web host, but regardless of what causes the mistake, a backup will have you covered. It is your responsibility to keep a backup of your website.
Scheduled backups are extremely useful, but do not think they are a flawless defense. You should always keep multiple copies in a different location and this is easy to accomplish by setting multiple scheduled backups to different locations. If you follow these basic guidelines you will always have at least one backup that you can use to restore your website.
Have you prevented any extended downtime on your website by restoring a backup file? Do you line up your scheduled backup with your content schedule?
